Sunday, June 7, 2009

Grilled Beef Fajitas


Apartments in North Carolina are not allowed grills on porches. How sad and miserable is that? When I lived in the Midwest, summer was all about grilling. Even winter! Let me count the ways I miss a grill beginning with this flavorful recipe. Nothing can replace a grilled, charred, smoky piece of meat flavored from wood or charcoal--even gas. 

I love home-made marinades, especially if they require refrigeration overnight, since the messy part is already done when it comes time to cook or to grill. This is such a recipe. Go ahead and slice the onions and peppers the night before, too. This is for 2-3 pounds of skirt steak. Half it for 1-2 pounds.

Skirt steak is a less expensive cut of beef (if there is such a thing in today's inflation-ridden world). You can sub flank steak, which is a bit more tender, thicker and wider. But, skirt steak, which has a bit more fat,  is known for its beefier flavor. Both tend to be on the tough side, so do not cook either until well-done. You want medium rare or rare. Thus, both do well to be marinated for tenderization. And be sure to cut against the grain with a very sharp knife.

When preparing the marinade, I suggest going easy on the salt since soy sauce already has plenty. If you don't have liquid smoke on-hand, go ahead and add a bit of smoked paprika (or add it in addition to the liquid smoke). My preferred soy sauce is Lee Kum Kee, found at specialty or Asian stores. Even World Bazaar. It has no comparison to bland super-market brands. Cumin can be powerful, so less is better than more. Or leave it out completely. I usually do.

When this is served, people often rave and prefer just the meat. Keep that in mind. And do garnish with a flurry of freshly-chopped cilantro! 

MARINADE:
  • 1/2 cup fresh lime juice (about 3)
  • 2/3 cup filtered/drinkable water
  • 1/4 cup fresh-smelling vegetable oil
  • 2 large garlic cloves, finely minced or pressed
  • 2 tablespoons white, distilled vinegar
  • 3-4 teaspoons soy sauce 
  • 1 teaspoon liquid smoke
  • 2 teaspoons salt (start will less)
  • 1 teaspoon chili powder
  • 1/2 to 1 teaspoon Cayenne Pepper--depending on taste*
  • dash or two of ground cumin (optional)
  • 1/2 teaspoon ground black pepper
  • 1/4 teaspoon onion powder
  • 2-3 pounds skirt steaks
Mix all the ingredients (except meat) in a bowl. Taste and re-season if necessary. Place skirt steaks in a 13x9x2 glass dish (not metal) or large plastic bag. Pour the marinade over meat and cover/seal securely.   If using a plastic bag, be sure to place on a pan or plate to catch and leakage should it occur. Refrigerate overnight. Turn meat several times during the marinade process to ensure uniform coverage. If you don't have time to marinate over night, allow about 2-3 hours in the marinade at room temperature, but overnight is best.


ONION AND PEPPER GARNISH
Use any combination of red, green, yellow or orange peppers.  I do not recommend commercially, pre-sliced peppers from the supermarket since they are often treated with preservatives and very very wet.
  • 2 medium, yellow onions
  • 1 red pepper
  • 1 yellow or orange or green pepper
  • 2 teaspoons soy sauce
  • 1/4 cup water
  • 1 teaspoon fresh lime juice
In a small bowl or measuring cup, mix the soy sauce, water and lime juice. Cover and set aside until ready to use.

Peel and thinly slice onions--then slice each round in half. Slice peppers lengthwise into thin strips and then cut strips in half. Toss into a large bowl and cover until ready to use.

Cook and Assemble

1. Fire up the grill. When hot, cook meat over medium-high or indirect heat heat until done. I prefer indirect. Remember, you want it rare, medium rare. Do not overcook! Flip after 3-4 minutes. Start checking for doneness after seven minutes. 

2. Meanwhile. . . drizzle a bit of oil in a large pan. When hot, add the onions and peppers. Cook just until tender and onions begin to soften. You can do this on the grill or in the kitchen. Add the soy sauce mixture and allow to cook down a bit. Remove to a bowl.

3. Remove meat to a cutting board. Cover with foil and allow to rest for at least five minutes. Using a sharp knife, slice into thin strips against the grain at a 45-degree angle.

4. Assemble meat and onion/pepper mix on individual, warmed tortillas. Serve with any of the following condiments:

sour cream
guacamole
sliced avocados
grated cheese
shredded lettuce
salsa

*Since writing this recipe, I now substitute any recipe that calls for  "red pepper flakes" or  "Cayenne Pepper" with dried Aleppo Peppers. Not always easy to find, they are so worth the search and effort. They will give you a kick, but not as intense or crazy. And they carry great flavor like a quality ground pepper. 

Sunday, May 10, 2009

Grilled Chicken Tenderloins with Rosemary/Garlic/Lemon Marinade


Living in the South, I have abundant, year-round access to one of my favorite herbs: rosemary. Here it grows to the size of a shrub and can actually be a nuisance in the garden. I recently made this marinade for chicken tenders and we devoured each and every one. I'm sure it would work well with chicken breasts, too. Just be sure not to overcook them.

Yes, it is a lot of rosemary; so, if you have a friend who grows it, neighborly ask/trade for some! The older the rosemary plant, the better the flavor. And don't throw away those woody stems. They are useful as skewers for shrimp, added to the soup pot, or a batch of peach jam for added flavor.

Not all lemons are the same. Taste first. If growing your own or fresh picked, they tend not to be as "sour." If not organic, scrub the skin before zesting. Some people don't use butter. That would be a misfortunate error. 


  • 12-16 meaty chicken tenders
  • 1/4-cup soft, unsalted butter
  • 1/4-cup olive oil
  • 1/2-cup fresh rosemary needles stripped from stems
  • 3 large garlic cloves, peeled
  • Zest from one lemon, preferably organic
  • 1/4 cup fresh lemon juice
  • Pinch or two red pepper flakes or Aleppo pepper (optional)
  • Salt and Pepper
Place butter, olive oil, rosemary needles, peeled garlic cloves, lemon zest and lemon juice in a food processor and pulse until fully blended.

Arrange washed and dried chicken tenders on a baking sheet with foil. Place close together. Sprinkle with fresh salt and pepper to taste. With a spoon, spread each tender with herb mixture. Place in refrigerator until butter sets and then cover with another sheet of foil. Allow to marinate for 3-6 hours. I find that  covering with foil works better than cling film. 

Start grill. Just before cooking, coat grill with non-stick spray. Cook tenders over medium (indirect) heat, herb mixture side up. When edges begin to turn white, carefully flip over and continue to cook--a few minutes per side. Do not overcook. When they begin to brown, that's it. If you allow for charred, black grill marks, the outer flesh will be tough and stringy. Remove to a pan and cover with foil. Allow to rest 5-10 minutes before serving. If desired, grill lemon slices/halves to use as garnish. Sprinkle with parsley or, better yet, torn basil leaves.

Note: You can save a bit of the marinade to baste the chicken while cooking or to use as extra sauce for people to brush on their chicken. I serve this with plain white rice and sauteed button mushrooms with green onions. Fresh garden tomatoes and cucumbers are also welcome.


A simple but special-and-flavorful meal.

Saturday, April 11, 2009

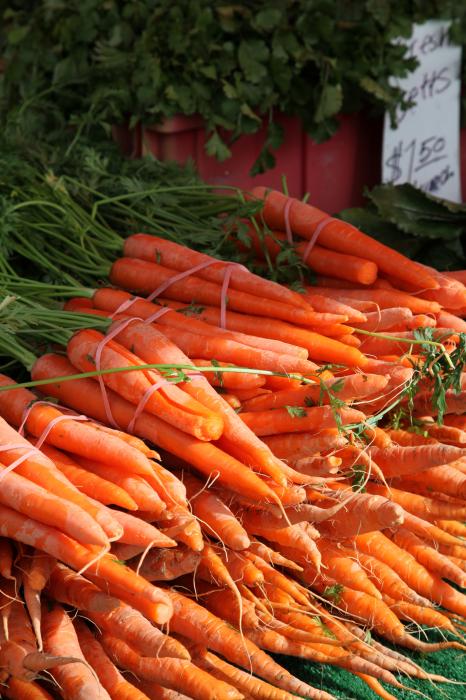
Vintage Baked Carrot Casserole

http://fineartamerica.com/images-medium/carrot-bounty-enzie-shahmiri.jpg


Once, for a dinner party, I searched everywhere for a unique carrot recipe. I wanted that orange color to go with the rest of what I had prepared without a lot of prep or extra fanciness. I finally found this one in my grandmother’s old cookbook. Each time I serve it for guests, they request the recipe.

I'm not sure what "shredded" meant, so I used a thin, matchstick slice on my mandolin, a bit thinner than the matchstick carrots you'd find already done in the supermarket. If you buy the already-prepared ones from the grocery store, just saute a bit longer before baking.

Considering the time period, "shredded" may have meant to use the box "grater"???  I don't know. Try to use minimally processed or organic carrots. The wive's tale is that the sweeter ones have a rounded, not pointed tip.

For years I worked in Produce Departments at grocery stores. A good grocery will ship in boxes of bulk carrots. At best, they are washed. That's it. Those were always the best sellers.
  • 3 tablespoons butter
  • 1/4 cup finely chopped onion
  • 2 cups peeled, shredded carrots
  • 3/4 teaspoon salt
  • 1 teaspoon sugar
  • 1/2 cup water
Melt butter in saucepan. Add onions and sauté for about 3 minutes. Add the carrots and stir, coating with butter and onion mixture.

Place in a baking dish (about 1 quart) Sprinkle with the salt and sugar. Sprinkle the water over them. Cover and bake at 350 F until they are tender (about 30 minutes or so).

This recipe shines alongside my recipe for creamed onions--two dishes one rarely sees anymore. I once brought both to a dinner party where people's skepticism was eased on their first forkful. One guest looked at me and said "You've been holding out on us." LOL. 

These are really good.

Tuesday, March 3, 2009

Vintage Hershey Bar Fudge


This is a super-old recipe when Baker's Chocolate was just about the only option one had when baking. And when one could actually find a 13-ounce Hershey's chocolate bar.

Chocolate has come a long way.

As a teacher, I often made this fudge as a reward for students. And I made it for Christmas Open Houses when I owned an art studio. It adapts easily to additions, such as black walnuts. Because I don’t like it too sweet, I add an extra 2 ounces of unsweetened chocolate and then 2 ounces less milk chocolate. The original recipe calls for 13 ounces each of semi-sweet chocolate and Hershey's chocolate bar. You do you.

I found a few similar recipes on line but they use evaporated milk. I have not tried that. Below is a similar recipe from the blog "Real Life Dinner" that uses the evaporated milk and mini marshmallows instead of large. Many others use Fluff. Again, I have not tried that nor do I know how many marshmallows is equivalent to one jar of Fluff. 

Evaporated milk has had the water "evaporated" from milk; hence, it's creamier. "Real Life Dinner" uses 2/3 cup evaporated milk for 1/2 of this recipe. If you double it, that would be 1 1/3 cup evaporated milk with the four cups of sugar.

Have everything measured, chopped, and ready to go. Line your pan with parchment paper and then lightly butter it. I've made this without lining the pan and it's a nightmare to remove. And do not use tin foil.

Use whole milk. Not 2 percent milk.

Avoid scraping the sides of the pot--it will make your fudge "grainy." Again, after you pour it into your pan, do not scrape the sides clean--it will make you fudge grainy. Instead, just scrape it into a separate bowl for kids to dig into.

If you half this recipe, use an 8 x 8 pan.

In a large pot, mix the following ingredients:
  • 1 cup whole milk
  • 4 cups sugar
  • 1 teaspoon vanilla
  • 1 cup real butter
Stirring, bring to a boil and boil for two minutes, stirring constantly.

Remove from heat and add:
  • 25 large marshmallows
Stir until melted.

Add:
  • 2 oz. Baker’s Unsweetened Chocolate
Stir until melted and smooth.

Add:
  • 13 oz. Baker’s Semi-Sweet Chocolate
Stir until melted and smooth.

Add:
  • 11 oz. Hershey’s Milk Chocolate
Stir until melted and smooth. Add nuts if desired.

Pour into a parchment-lined 12 x 16 metal sheet pan. Chill until set. Carefully remove from pan and remove paper. Cut using a heavy knife or bench scraper. 

Photo taken from hershey-bar-fudge