|
| The whiskey in this recipe is nuanced, not overt. Its smokiness blends beautifully with the apples and spices. |
Inspired by the Little House on the Prairie books when I was in grade school, the first thing I ever attempted to bake was an apple pie. I had picked some wild apples that grew in the woods. In my mind, I was already there. My chance came when my parents left for the evening. Needless to say, I gave up with the crust and when my parents arrived home, it wasn't to a pie and I was scolded for making a mess.
Now, I'm usually the family-designated pie maker. Time and practice . . . (I won't lie. Making a pie is daunting, especially if you've never done it before.)
When I had my small art studio and had to compete with bigger and better-funded businesses/galleries, I used apple pie as a lure for special events. I couldn't afford a caterer, but I could cook. For one art opening, I borrowed a client's kitchen and made a half dozen apple pies with local produce. With cheese and wine, it was a hit. Later, I switched to apple cobbler which was easier to prepare. And then soups in the autumn and winter. People loved it.
Apples, of course, are the key to a good pie. You want apples that are crisp, not soft and mealy. I usually use and recommend a variety of apples with at least one or two being Yellow Delicious and, if one can find them, Winesaps. The only exception are Honey Crisps, and that is what I now use whenever possible. I don't care if their price is double normal apples. They're "abnormality" is worth the price and the taste.
I'm not a believer in a large two-crust, fruit-filled pie. They get soggy in the middle and are often under baked. I prefer a six or seven-inch pie which has a great ratio of crust to fruit. (A pie plate is measured from the bottom, side to side; not from the top, rim to rim.)
The recipe for pie crust is below. Or use your own. I'm always fiddling to find a new way to make pie crust. I have no qualms with store-bought roll your own . . .
Don't be put off by the whiskey. You want one that is "smoky" with some added depth. I use Jack Daniels. I like to buy the small bottles at the liquor store, (including other flavors and varieties) to keep on hand just for cooking and baking.
To cook your apples before filling the pie crust or not to cook? That's your question and the answer is how you were brought up. We never did this extra step and extra pan to wash up. But it does have its advantages since you can gauge the doneness of your apples before the pie is baked. The bad side of the coin is that it can leave you with "mushy" apples.
I skip that step. It really depends on your apples, how you slice them, and your expertise and confidence at making apple pies. I like to use a mandolin and slice my apples thin. If you have super crisp apples, you want thin. If you don't like thin apples, you may want to sauté them in advance to give them a head start before baking.
Crisp apples should always be cut a bit thinner than softer, especially if you are using a blend of apple varieties. You want them to cook at the same time.
I like to drain the sugary juice from the apples into a separate bowl to taste and re-adjust seasonings. That is a good place to add your flour and/or cornstarch to make a slurry and then incorporate into apples (see note below).
Honestly, folks. I've made a lot of apple pies in my lifetime, but this is my favorite, by far.
Makes one seven-inch pie
- 5 cups peeled, chopped apples (about 3 lbs before peeling and cutting), preferably Honey Crisp or a blend which includes one or two Yellow Delicious
- 1/3 cup white sugar
- 1/4 cup light brown sugar
- 1-2 tablespoons of flour (start with one tablespoon)
- 1 heaping teaspoon cornstarch
- 1/2 - 3/4 teaspoon cinnamon
- 1/4 teaspoon fresh-grated nutmeg
- 4 allspice berries, crushed
- 2-3 tablespoons whiskey
- 1 teaspoon vanilla extract
- 1-2 teaspoon fresh lemon juice (optional)
- 1 tablespoon cold butter
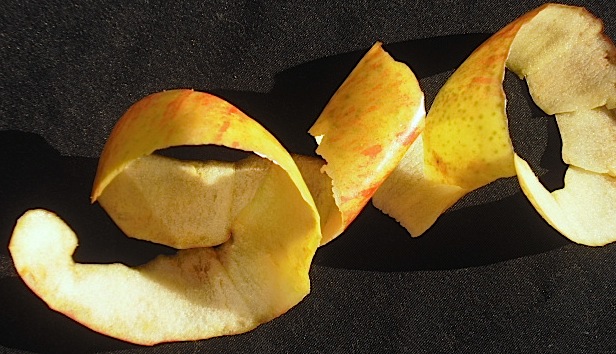
Peel your apples into a plastic shopping bag. It makes cleaning up much easier. It's not necessary to core your apples. Just begin slicing around and around the apple. And then chip away at the top and the bottom.
Mix the flour, white and brown sugar, cornstarch, cinnamon, nutmeg, allspice in a small bowl. Set aside.
Mix the whiskey and vanilla in a small bowl. Sprinkle over the apples and allow to sit several minutes. If your apples are on the sweet side or just a bit bland, add a bit of lemon juice. A few grates of lemon zest is good, too. It's your call.
Roll our your bottom crust and place in pie dish. Sprinkle two tablespoons of the spice/sugar mixture over the bottom. Add remaining to the apples in the bowl and toss well to coat. Taste. Re-adjust seasonings, if necessary. If your apples are unusually juicy, sprinkle with flour beginning with less.
Add apple mixture evenly to pie plate. Do not mound it in the center, you want the apples to cook evenly. Dot with the butter. It's easy to forget this step. Place top crust on top and gently press around the rim of the plate.
 |
Gently press dough around rim of plate
to create a tight seal so filling
does not seep out while baking. |
Crimp the edges. Cut a vent hole in the center and make four slashes around it being careful not to go too near the edge or it may bubble over when baking.
 |
The pie itself is the sun. The hole in the center is Earth. The slashes are the four
directions of N, S, E, W. The pie becomes that
which made the apples . . . |
Using strips of tin foil, cover the edge of the crust to prevent burning or use a tin pie shield. They come in varying sizes and there is one that is adjustable:
Place on a cookie sheet or heavy piece of foil to catch any drippings. Bake in a pre-heated 400 F degree oven and bake for 40 minutes. Remove tin foil strips and bake for another 10 minutes until juices begin to appear and tip of paring knife easily goes into apples without restraint.
Allow to cool completely before cutting. Do not even think of cutting, regardless of people begging you. The hot filling will simply leak away and be absorbed into the bottom crust leaving it soggy.
Notes:
Whiskey is the British and Canadian spelling. Whisky is the American version. Brandy is fermented grapes. Whiskey is distilled grain.
Allspice berries are incredible and I recommend grinding your own.
Here's a trick: when you're adding your spiced apples to the pie shell, you may notice they are leaving behind a lot of liquid. Remove the apples with a slotted spoon, leaving behind the liquid. To the liquid, add a good teaspoon of cornstarch and mix to dissolve. Evenly spoon the mixture over the apples. It will make a nice thickener.
PIE CRUST
Nothing instills greater fear in a a cook or baker than the dreaded words "pie crust." It's almost become a "voodoo" recipe replete with a strange dance of ingredients from vinegar to egg white to vodka. It's now possible to buy wonderful dough premade, a real convenience, especially around the holidays. But when the package costs as much as a bag of flour, I'll make my own. And the food processor makes it pretty easy.
I also use lard. That's right. lard. It's actually healthier for your than butter. Here's my usual spiel:
One tablespoon of lard has 10 mg of cholesterol. By contrast, one tablespoon of butter has 30mg of cholesterol. What about fat content? Well, one tablespoon of lard has 13% fat, of which six is saturated fat. By contrast, one tablespoon of butter has 11% fat, of which seven is from saturated fat.
One tablespoon of Crisco all-vegetable shortening is 12g of total fat of which 3 is saturated fat but contains no cholesterol.
I've mixed equal parts of lard and butter, which works well, too. But now I just use all lard. It makes for a great-tasting, flaky crust. And it makes it easy to roll out.
I don't make large pies, especially fruit-filled pies. They can get soggy and be difficult to cut and to serve. I'd rather make two, seven or eight-inch pies than one ten-inch pie. To me they offer the perfect ratio of crust to filling. And I never mound the fruit a mile-high. Why? Again, I like a good ratio of crust to filling and the sides of the pie bake quicker than the middle. A pie is not a cake. It does have to rise in the middle.
Makes one crust for a 6 or 7-inch pie plate
- 3/4 cup all-purpose flour
- 4 tablespoons cold lard (or one tablespoon cold butter and 3 tablespoons cold lard)
- 1/4 teaspoon table salt
- 1-2 teaspoons white sugar
- 3-4 tablespoons cold water
Place the flour and salt in processor. Whirl to combine. Add the cold lard/butter and pulse just until crumbly and lumpy.
Remove top and add 3 tablespoons of the cold water. Replace top and pulse for several seconds. If needed, drizzle in the the last tablespoon of cold water a little at a time while pulsing until a dough balls forms clean from the sides. Done.
Remove to a floured surface and knead once or twice. Cover in shrink wrap and refrigerate until needed.
Repeat process for second batch. No need to clean or wash the food processor.
To roll: Sprinkle your work surface with flour. (I use a sheet of plywood and when I'm done I just take it outside to whisk off the flour etc. for easy cleaning). Begin pressing and shaping your ball of dough into a round using your hand.
The key to rolling our your dough is to
keep it moving. Flip over several times and sprinkle with a bit more flour. If you keep it stationary in one spot, it will usually end up sticking to the surface. As it thins out, you should still be able to shift it from the flour beneath it.
Roll to one inch larger than your pie plate.
Gently lift the dough and fit into plate. Fill with filling and proceed with top crust. Crimp. Vent. Bake.
If you have scraps of dough, which I did here, re-roll and make into leaves. Wet the bottoms with water and gently press on top of crust.