Tuesday, September 8, 2009

Crescent Roll Cheese Cake Squares (Easy Mexican Sopapilla)


Served warm from the oven or chilled from the fridge, these easy-to-prepare cheese squares
are destined to hit the bull's-eye-of-approval from family and friend.

I wasn't really sure what to call this. Or how to categorize it. I used to make a similar recipe years ago that was simply dusted with powdered sugar. I prepared this one for the usual Sunday morning "surprise." Served warm it's wonderful. Refrigerated, it's even better. The recipe is easily halved. It's now possible to buy crescent rolls in a single sheet instead of being perforated to separate into rolls.

The cream cheese is absorbed into the flaky pastry leaving a wonderful custard-like middle. The sugar topping provides just the right amount of "crunch."

FILLING
  • 1, 8-ounce pacakage softened cream cheese
  • 1 cup white sugar
  • 1 teaspoon vanilla extract
  • 2, 8 ounce packages refrigerated crescent rolls
TOPPING
  • 1/2 cup melted butter (you won't use it all)
  • 1/2 cup white sugar
  • 1 teaspoon ground cinnamon

Preheat oven to 350 and spray a 9 x 13 baking pan.

Beat the cream cheese with the sugar and vanilla until smooth.

Unroll one package of crescent rolls and roll to fit into the pan. If using the non-perforated kind, it is already shaped to fit. Spread the cream cheese mixture evenly over the layer and top with the remaining sheet of dough.

Stir together the sugar and cinnamon.

Liberally brush the top layer with the melted butter. When you think it's too much, brush with more. Evenly sprinkle the sugar/cinnamon mixture over the top.

Bake for 30 minutes until the dough has puffed and the corners are golden brown and sugar has absorbed the butter and is a solid crisp layer. Cool at least 20 minutes before slicing. Store leftovers in refrigerator.

Saturday, September 5, 2009

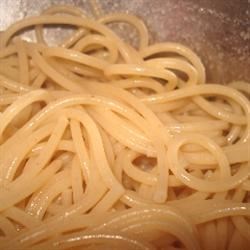
Pasta with Garlic, Olive Oil and Parmesan

Reheating Pasta

When we think pasta, we tend to think of sauces. That's too bad, because pasta on its own is a simple delight and a great side for most meals. And it's pretty inexpensive, too. Add some diced, grilled chicken or shrimp, and you have an instant meal.

Pasta ABSORBS a lot of liquid. That's just what you want. And it requires a lot of salt. I find that 2-3 garlic cloves work best. Use less or more if that's your taste--but not much more.

If you have access to Italian-made pastas, by all means use them for this recipe. Italian pastas, available in many shapes and sizes, have a better taste and "bite" than American-made counter parts.

The key is here is adding the cheese to the cooked pasta. Do not attempt to add the cheese all at once. It will result in one huge gloppy clump and you will be very sad. Add in increments, mixing thoroughly after each.

Please note: this recipe does not contain milk or cream. It's basically, pasta, cheese, water.

  • 1 box pasta, such as angel hair, spaghetti, vermicelli, linguine
  • 1-3 garlic cloves, depending on taste and size, peeled
  • 1/2- 3/4 cup good olive oil
  • 2 tablespoons unsalted butter
  • 2 cups finely shredded Parmesan cheese
  • 1 tablespoon sea salt or other "non-table" salt, more as needed
  • Freshly-ground black pepper to taste or
  • Aleppo pepper flakes or red pepper flakes, Aleppo preferred
  • Fresh-grated lemon zest (optional)
  • Fresh basil leaves or parsley (optional)

Bring a large pot of salted water to a boil.

Meanwhile . . . get out the largest non-plastic, non-metal bowl you have, preferably with a flat bottom. Into it, "zest" your peeled garlic using a fine micro plane or a garlic press. (I highly recommend the micro plane). Lacking both, finely mince your garlic. Sprinkle with table salt and using the back of a large, flat knife, press back and forth until a paste forms. Lacking that initiative, mash the garlic in a mortar and pestle. Lacking that . . . well, you shouldn't be cooking.


A micro plane. No kitchen should be without one!

Place the garlic in the bottom of your bowl. Add the olive oil. Add the tablespoon of salt and about 20 grinds of fresh, black pepper. Stir. Dot with the butter and set aside. If using, add several grates of lemon zest and a few pinches of Aleppo pepper. You do not want this pasta "spicy."

Meanwhile . . . Using your trusty micro plane, zest about 2 cups from a wedge of Parmesan. The micro plane will make it nice and fluffy so it melts instantly into the hot pasta.

Add 1 box of pasta to the boiling water. Bring back to a boil and cook according to package directions. If using angel hair pasta, do not walk away from the pot! Angel hair pasta cooks within minutes and you don't want a clumpy mess.

When pasta is done, turn off the heat. Do not drain your pasta! Using a pasta ladle, remove several helpings of the pasta from the water and add to the bowl containing your garlic, olive oil, salt, pepper and butter. Don't worry if water gets in--you want some. Pasta will absorb it. Mix the oil mixture into the pasta. Sprinkle some of the cheese of top and combine. Repeat this procedure until no more pasta remains. (At this point, I often just use my hands to mix everything.) Taste and add more salt and pepper if necessary. If you wish, add some freshly-minced parsley to it and sprinkle with a bit more cheese. If desired, sprinkle with a chiffonade of basil leaves.


TIP: To keep the pasta warm while you get the rest of the meal together, place a cloth dish towel over the pan of pasta water (be sure heat is off and away from other burners that may be on). Now set your bowl of pasta on top of it. The trick is not to let the bowl come into contact with the hot metal thus avoiding a crack. Cover the pasta with a sheet of cling wrap. Stir just before serving.

Enjoy.


Tuesday, September 1, 2009

Coleslaw


Coleslaw needn't be a boring affair. Often, it's too bland. Or sodden with vinegar. One wants to achieve that balance between sweet and tangy. If you like the coleslaw at KFC, you'll probably like this. It's a cinch to prepare and pre-packaged slaw mixes cut the prep time in half.


The word itself is a blend of Dutch and French. Kool in Dutch means "cabbage." Sla a reduced form of the French "salade." The blending is uniquely American--Cole-Slaw.

  • 1, 16-oz. bag shredded cabbage or 2, 10 oz. bags
  • 2, carrots, peeled and shredded
  • 2-4 tablespoons finely-minced parsley
  • 2/3 - 1 cup mayonnaise
  • 3 tablespoons vegetable oil
  • 1/2 cup white sugar
  • 2 tablespoons white vinegar or rice vinegar
  • 1/4 teaspoon salt
  • 1/2 teaspoon poppy seeds

In a very large bowl, combine cabbage and carrots.

In a medium bowl, whisk together the mayo, vegetable oil, sugar, vinegar, salt and poppy seeds. Taste. Add more vinegar if necessary.

Pour dressing over the slaw and mix thoroughly.

Refrigerate a couple hours before serving.

NOTE: You can use Miracle Whip salad dressing, but lessen the amount of vinegar called for.

Thursday, August 13, 2009

Rhuberry-Pie


Who doesn't love pie? More importantly, who doesn't love pre-made pie crusts? Just roll 'em out, fill, cover and bake. What could be easier? I know there are "purists" who insist on lard in their crusts (and I agree). But, guess what? (Am I using too many questions for this blog?) Most pre-packaged pie crusts are made with lard. That's why they're so good.


Anyway, I wanted a pie and I wanted it fast. But I didn't have enough berry ingredients. On hand were a few stalks of rhubarb, a half-filled large container of strawberries and some leftover blueberries. I put them all together and created what I now call a RHUBERRY PIE! You have to try it! Let me know if you do? It's my FAVORITE pie!!!

  • Two-crust, 9-inch pie dough
  • 2 cups chopped/diced rhubarb*
  • 2 cups sliced strawberries
  • 1 cup blueberries
  • 1 cup white sugar
  • 1/3- 1/2 cup flour
  • 1 teaspoon cinnamon
  • allspice
  • 2 tablespoons butter
If using pre-made crust, sprinkle with a bit of flour and roll to fit a 9-inch pie plate.

Be sure fruit is rinsed and DRY (rinse the berries the night before and allow to drain/dry. If you don't have time, put whole berries in a salad spinner). Place in a large bowl, mix together the sugar, flour, cinnamon and just a few sprinkles of allspice. Mix to blend. Add berries and carefully blend.

Pour into pie shell and dot with tiny pieces of butter. Roll out top crust. Cover pie. Tuck under edges. Crimp and flute. Cut air vents** and bake in a 425-degree oven for about 40-45 minutes until juices just begin to flow.

Allow to cool before cutting. Never, ever cut a hot pie. Never, ever cut a warm pie. Serve with vanilla ice cream or frozen yogurt--a must!

*For large stalks of rhubarb, I peel them first. Slice lengthwise once or twice and then dice. For large strawberries, I slice in half and then into thirds.

**Why do some pies have a latticed top crust? (There I go with the questions, again!) It's science. The open structure allows the steam to escape so the filling is less watery. When the pie cools and you slice it, it isn't runny. But who has time to labor over a woven lattice? Solution? Simple. Cut about 4-5 one-and-a-half-inch circles in a circle around the center of the top crust. This looks kind of neat and allows plenty of steam to escape. Take the scraps and artistically place them on the top crust, securing with a bit of water on the underside. Cut out the holes before you place the top crust on the pie.