Monday, January 30, 2012

Apple Pie with Whiskey

The whiskey in this recipe is nuanced, not overt. Its smokiness blends beautifully with the apples and spices. 


Inspired by the Little House on the Prairie books when I was in grade school, the first thing I ever attempted to bake was an apple pie. I had picked some wild apples that grew in the woods. In my mind, I was already there. My chance came when my parents left for the evening. Needless to say, I gave up with the crust and when my parents arrived home, it wasn't to a pie and I was scolded for making a mess.

Now, I'm usually the family-designated pie maker. Time and practice . . . (I won't lie. Making a pie is daunting, especially if you've never done it before.)

When I had my small art studio and had to compete with bigger and better-funded businesses/galleries, I used apple pie as a lure for special events. I couldn't afford a caterer, but I could cook. For one art opening, I borrowed a client's kitchen and made a half dozen apple pies with local produce. With cheese and wine, it was a hit. Later, I switched to apple cobbler which was easier to prepare. And then soups in the autumn and winter. People loved it.


Apples, of course, are the key to a good pie. You want apples that are crisp, not soft and mealy. I usually use and recommend a variety of apples with at least one or two being Yellow Delicious and, if one can find them, Winesaps. The only exception are Honey Crisps, and that is what I now use whenever possible. I don't care if their price is double normal apples. They're "abnormality" is worth the price and the taste.

I'm not a believer in a large two-crust, fruit-filled pie. They get soggy in the middle and are often under baked. I prefer a six or seven-inch pie which has a great ratio of crust to fruit. (A pie plate is measured from the bottom, side to side; not from the top, rim to rim.)

The recipe for pie crust is below. Or use your own. I'm always fiddling to find a new way to make pie crust. I have no qualms with store-bought roll your own . . . 

Don't be put off by the whiskey. You want one that is "smoky" with some added depth. I use Jack Daniels. I like to buy the small bottles at the liquor store, (including other flavors and varieties) to keep on hand just for cooking and baking.

To cook your apples before filling the pie crust or not to cook? That's your question and the answer is how you were brought up. We never did this extra step and extra pan to wash up. But it does have its advantages since you can gauge the doneness of your apples before the pie is baked. The bad side of the coin is that it can leave you with "mushy" apples. 

I skip that step. It really depends on your apples, how you slice them, and your expertise and confidence at making apple pies. I like to use a mandolin and slice my apples thin. If you have super crisp apples, you want thin. If you don't like thin apples, you may want to sauté them in advance to give them a head start before baking. 

Crisp apples should always be cut a bit thinner than softer, especially if you are using a blend of apple varieties. You want them to cook at the same time.

I like to drain the sugary juice from the apples into a separate bowl to taste and re-adjust seasonings. That is a good place to add your flour and/or cornstarch to make a slurry and then incorporate into apples (see note below).

Honestly, folks. I've made a lot of apple pies in my lifetime, but this is my favorite, by far.


Makes one seven-inch pie

  • 5 cups peeled, chopped apples (about 3 lbs before peeling and cutting), preferably Honey Crisp or a blend which includes one or two Yellow Delicious
  • 1/3 cup white sugar
  • 1/4 cup light brown sugar
  • 1-2 tablespoons of flour (start with one tablespoon)
  • 1 heaping teaspoon cornstarch
  • 1/2 - 3/4 teaspoon cinnamon
  • 1/4 teaspoon fresh-grated nutmeg
  • 4 allspice berries, crushed
  • 2-3 tablespoons whiskey
  • 1 teaspoon vanilla extract
  • 1-2 teaspoon fresh lemon juice (optional)
  • 1 tablespoon cold butter

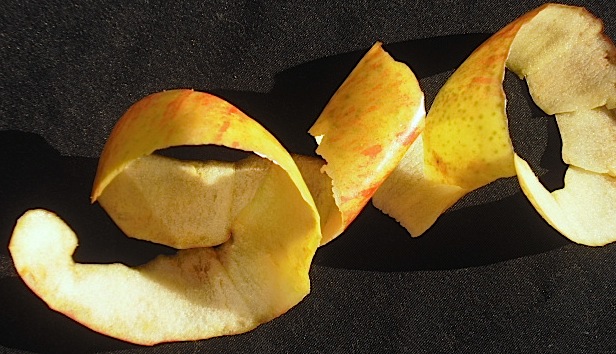
Peel your apples into a plastic shopping bag. It makes cleaning up much easier. It's not necessary to core your apples. Just begin slicing around and around the apple. And then chip away at the top and the bottom.


Mix the flour, white and brown sugar, cornstarch, cinnamon, nutmeg, allspice in a small bowl. Set aside.


Mix the whiskey and vanilla in a small bowl. Sprinkle over the apples and allow to sit several minutes. If your apples are on the sweet side or just a bit bland, add a bit of lemon juice. A few grates of lemon zest is good, too. It's your call.


Roll our your bottom crust and place in pie dish. Sprinkle two tablespoons of the spice/sugar mixture over the bottom. Add remaining to the apples in the bowl and toss well to coat. Taste. Re-adjust seasonings, if necessary. If your apples are unusually juicy, sprinkle with flour beginning with less.

Add apple mixture evenly to pie plate. Do not mound it in the center, you want the apples to cook evenly. Dot with the butter. It's easy to forget this step. Place top crust on top and gently press around the rim of the plate.


Gently press dough around rim of plate
to create a tight seal so filling
does not seep out while baking.

Crimp the edges. Cut a vent hole in the center and make four slashes around it being careful not to go too near the edge or it may bubble over when baking.

The pie itself is the sun. The hole in the center is Earth. The slashes are the four
directions of N, S, E, W. The pie becomes that
which made the apples . . .

Using strips of tin foil, cover the edge of the crust to prevent burning or use a tin pie shield. They come in varying sizes and there is one that is adjustable:


Place on a cookie sheet or heavy piece of foil to catch any drippings. Bake in a pre-heated 400 F degree oven and bake for 40 minutes. Remove tin foil strips and bake for another 10 minutes until juices begin to appear and tip of paring knife easily goes into apples without restraint.

Allow to cool completely before cutting. Do not even think of cutting, regardless of people begging you. The hot  filling will simply leak away and be absorbed into the bottom crust leaving it soggy.


Notes:

Whiskey is the British and Canadian spelling. Whisky is the American version. Brandy is fermented grapes. Whiskey is distilled grain.

Allspice berries are incredible and I recommend grinding your own.

Here's a trick: when you're adding your spiced apples to the pie shell, you may notice they are leaving behind a lot of liquid. Remove the apples with a slotted spoon, leaving behind the liquid. To the liquid, add a good teaspoon of cornstarch and mix to dissolve. Evenly spoon the mixture over the apples. It will make a nice thickener.


PIE CRUST

Nothing instills greater fear in a a cook or baker than the dreaded words "pie crust." It's almost become a "voodoo" recipe replete with a strange dance of ingredients from vinegar to egg white to vodka. It's now possible to buy wonderful dough premade, a real convenience, especially around the holidays. But when the package costs as much as a bag of flour, I'll make my own. And the food processor makes it pretty easy.

I also use lard. That's right. lard. It's actually healthier for your than butter. Here's my usual spiel: 

One tablespoon of lard has 10 mg of cholesterol. By contrast, one tablespoon of butter has 30mg of cholesterol. What about fat content? Well, one tablespoon of lard has 13% fat, of which six is saturated fat. By contrast, one tablespoon of butter has 11% fat, of which seven is from saturated fat.

One tablespoon of Crisco all-vegetable shortening is 12g of total fat of which 3 is saturated fat but contains no cholesterol.

I've mixed equal parts of lard and butter, which works well, too. But now I just use all lard. It makes for a great-tasting, flaky crust. And it makes it easy to roll out.

I don't make large pies, especially fruit-filled pies. They can get soggy and be difficult to cut and to serve. I'd rather make two, seven or eight-inch pies than one ten-inch pie. To me they offer the perfect ratio of crust to filling. And I never mound the fruit a mile-high. Why? Again, I like a good ratio of crust to filling and the sides of the pie bake quicker than the middle. A pie is not a cake. It does have to rise in the middle.


Makes one crust for a 6 or 7-inch pie plate
  • 3/4 cup all-purpose flour
  • 4 tablespoons cold lard (or one tablespoon cold butter and 3 tablespoons cold lard)
  • 1/4 teaspoon table salt
  • 1-2 teaspoons white sugar
  • 3-4 tablespoons cold water

Place the flour and salt in processor. Whirl to combine. Add the cold lard/butter and pulse just until crumbly and lumpy.


Remove top and add 3 tablespoons of the cold water. Replace top and pulse for several seconds. If needed, drizzle in the the last tablespoon of cold water a little at a time while pulsing until a dough balls forms clean from the sides. Done. 


Remove to a floured surface and knead once or twice. Cover in shrink wrap and refrigerate until needed. 

Repeat process for second batch. No need to clean or wash the food processor.


To roll: Sprinkle your work surface with flour. (I use a sheet of plywood and when I'm done I just take it outside to whisk off the flour etc. for easy cleaning). Begin pressing and shaping your ball of dough into a round using your hand.

The key to rolling our your dough is to keep it moving. Flip over several times and sprinkle with a bit more flour. If you keep it stationary in one spot, it will usually end up sticking to the surface. As it thins out, you should still be able to shift it from the flour beneath it.

Roll to one inch larger than your pie plate.


Gently lift the dough and fit into plate. Fill with filling and proceed with top crust. Crimp. Vent. Bake.


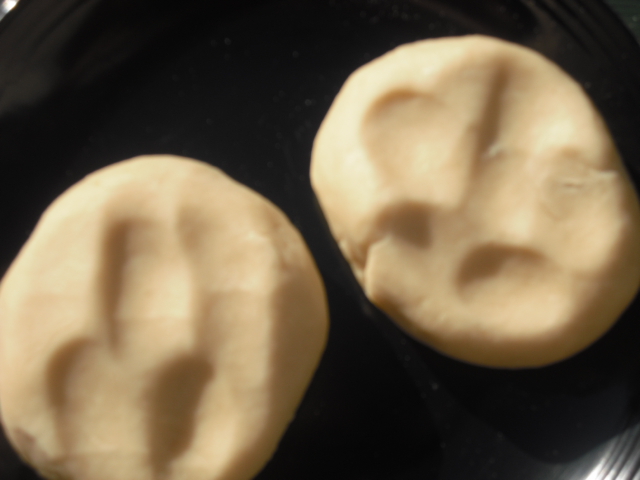
If you have scraps of dough, which I did here, re-roll and make into leaves. Wet the bottoms with water and gently press on top of crust.

Wednesday, January 25, 2012

My New Breville Counter-Top Oven

This isn't your ordinary "toaster oven."


For about a year now, I've had my eye on a Breville counter-top, convection oven. With some Christmas money, I finally purchased it a week ago. I couldn't be happier.

Why a counter-top oven? For one thing, since I'm single, I don't need a standard-sized oven for most of what I bake, roast or broil. I hate having to turn on the oven to bake a small casserole or to cook a frozen entree. Second, since I rent, the ovens are never that great. The current oven isn't self-cleaning and, when I have to dial high temperatures, I find it gets too hot. I can take the counter-top oven with me when I move. It will save a lot of time having to get used to a new one.

And I'm still getting used to my Breville. But, so far, so good. Yesterday I baked a pie and it came out great--evenly browned on top without having to turn it around halfway through, thanks to the convection feature. Roast three chicken legs for dinner? No problem. 

I baked this apple pie in the Breville and it was
evenly browned all over. Just look at that crust!

The only downside is that it comes with just one rack. Eventually, I'll order another one. The top of the oven can get hot, but it's really handy to put your finished dish on top to keep it warm (and it prevents you from cluttering it up with junk). You can also order a special bamboo cutting board that fits on top. I'll probably do that, too. The broiling pan is extra-heavy duty and sturdy. It also comes with a 12-inch pizza pan.

Is it complicated? Not in the least. I thought it might be, but I was dead wrong. Simply dial what you want to do, such as bake, toast, pizza, re-heat, and the temperature and time is automatically configured for you. But you may manually change it just as easily. It weighs less than my microwave oven even though they are comparably sized.

Overall, I'm very impressed the way it cooks food so evenly. And it heats up in less  time than a standard oven. And, it just looks good.

It also toasts bread, but I'll do that in my toaster unless I'm going to do bagels or thicker slices. 

On the flip side, I can certainly see this in kitchens where a standard oven is not adequate and a second one is not an option because of financial or configuration issues. For those who entertain a lot, it's a must. And around the holidays when everyone needs more oven space, this is the perfect solution.

Breville makes several models, but I chose this one based on user recommendations from around the Internet. It's 1800 watts and has the convection feature.

I had a store coupon for 20% off the 250.00 price. A bit steep but, in the long-run, I think it will have been a good investment.


Sunday, January 22, 2012

Stale Bread for Breakfast


A local grocery store carries a brand of fresh-baked Semolina bread I like very much. They'll usually only put out a few loaves, so when I see one, I grab it. I keep it in the paper wrapping to preserve the crisp crust. (The wrapper also reminds me of something my grandmother would have had around her kitchen from a loaf she purchased at a Chicago bakery.) Needless to say, it goes stale in a few days. No matter. That's when I have it for breakfast. Yes, breakfast. Don't turn up your nose!

This only works with a quality artisan bread that adapts well to soaking up the liquid. Anything else will turn into a paste.


  • Stale, artisan bread, broken apart
  • Olive oil (use a good quality olive oil)
  • Salt and pepper
  • Boiling water
  • Onion powder (optional but recommended)


Place your stale bread in a bowl. Drizzle with olive oil. Sprinkle with a bit of salt and pepper and just a pinch or two of onion powder. Now begin pouring the boiled water over the bread. It will immediately begin to soak through like a dried sponge. Turn pieces over and drizzle with more hot water. Heel ends require a bit more soaking. Stir. Taste for seasonings. If crusts are still hard, add a bit more water so it sits in the bottom of the bowl and turn bread crusts so they rest in it. Break apart and enjoy. 


With a bit of grated hard cheese, this makes for a quick lunch. It's warm and filling. Sometimes I'm tempted to use milk, sugar and cinnamon, and for children, that would be great. But I enjoy the plain simplicity so much, I never deviate from the original plan. Enjoy, and remember your grandma!


Below is a video showing how Clara from "Great Depression Cooking" makes this:


Friday, January 20, 2012

More Tales from the Grocery Store: Trash Talk


Dear Grocery Shopper:

Thank-you for choosing our store for your shopping needs. We really and truly appreciate that you visit us and spend your hard-earned money. There is just one thing. Please take all your trash with you as you exit the store and parking lot.

I'm really happy that you took the time to compile a shopping list. But it has a limited reading audience. Trust me on this. It is not a best seller and never will be. STOP leaving them behind. I'm tired of taking them out of carts, picking them up off the floor and chasing after them in the parking lot. Just throw the damn thing away!

Printing flyers costs a lot of money. I'm glad you picked one up when you entered the store. But when you are finished, either put it back, throw it out, or take it with you.

Shopping carts are not trash cans. Below is a list of the most common items left behind:
  • Sani-wipes
  • Kleenex
  • Out-dated coupons
  • Sample cups
  • Napkins and toothpicks
  • Scratched-off lottery tickets
  • Empty cigarette packs
  • Candy wrappers
  • Beer bottles and cans
  • Empty chew tobacco cans
  • Water bottles
  • Toy wrappers
  • Receipts

The cart should be returned in the same condition upon entering the store: empty!

Please do not use the carts in the parking lot to clean out your car! And whomever left that king-sized, stained bed pillow in the cart a few months ago, well, that was just GROSS! We're not Goodwill. Old license plates, single mittens and gloves do not belong in grocery carts. If you fill a cooler with beer or soft drinks, do not leave the packaging in the cart. 


I'm glad you enjoyed your meal at McDonald's and Bo Jangles, etc., but the parking lot is not a garbage can. When you throw the used wrappers and bag outside the car door, things happen to it: like wind blowing it all over.

Speaking of fast meal joints, a science primer: a liquid is neither plastic nor paper. So when depositing drink containers in receptacles clearly marked "Plastic Only" or Paper Only" please empty them of whatever liquid remains in them. The only thing that is plastic on most soft drink cups is the lid and the straw. If it's a coffee cup, its just the lid. 

I know it's difficult to shop with children, but if you use the kiddie carts we provide, and if you feed your children while you shop, please clean up cookie crumbs, cracker crumbs, snotty tissues etc. from the cart before returning it.

Grocery carts are not cages. Leave your pets at home or in the car (someone once brought a rabbit!). This applies to humans. Please remove your children from the basket of the cart so we can fill them with your bags of groceries.

Spills and accidents are embarrassing. But please don't walk away from one if you created it. The quicker we can clean it up, the easier (and safer) it is on everybody. 

A store is no different than a home. That applies to you, guys, who work outside. Working boots covered with mud, clay, tar, grass belong outside, not inside. Don't make me tell your wives.

And to those few who think it cute to shop barefoot, you will be told to exit the building.

And, as always, leave your dirty, germ-infested recyclable bags at home.

Thank-you for shopping at our store.


Thursday, January 12, 2012

Chicken-Leek-Mushroom Pie (with Bacon)

A British classic. Now I know why!


What we call "pot pies" here in America were called savory pies in Ireland, England and Scotland. The chicken-leek pie is classic British fare. And leeks do make the dish. I also added mushrooms and, since I now live in the South, I added smoked hog jowl--bacon to you Northerners.

I became so frustrated with this recipe that I almost gave up and threw it out. The sauce was too thin and not at all what I wanted and I felt the chicken overcooked. Instead, I covered the meat/leek mixture and put it in the fridge. I doctored up the sauce (cream cheese does wonders) and put it over some whole-grain pasta. The following day I re-examined my recipe and amended it. I'm glad I did.

Don't even begin to think of this a Banquet frozen pot pie. The savory leek-and-thyme chicken mixture with a cheese-garlic Bechamel sauce and topped with a flaky crust is insanely, lick-the-dish-clean delicious and worthy of a white-linen table cloth.

Meat Filling

  • 10-12 ounces skinless, boneless chicken thighs (1 heaping cup) chopped into chunks
  • 2 medium leeks, sliced (about two cups)
  • 1 small onion, chopped, 1/2 - 3/4 cup
  • 4 ounces sliced baby button mushrooms (about 1 cup)
  • 1/4 cup chopped, thick-sliced bacon or skinless, smoked and sliced hog jowl (or pancetta)
  • 1/4 - 1/2 teaspoon dried thyme flakes
  • Salt and pepper to taste


Sauce

  • 2 tablespoons butter
  • 1/2 teaspoon pressed garlic or finely minced
  • 2 tablespoon all-purpose flour
  • 1 cup whole milk
  • 3/4 cup low-sodium chicken stock
  • 1/4 cup fresh-grated Parmiganno-Regianno cheese
  • Turmeric for color (optional)
  • 1 sheet frozen puff pastry


I almost threw away this old pan. It's great for throwing in chopped veggies.


Place bacon in heavy saucepan and begin to sautee. When it begins to brown and render its fat, add the mushrooms. If necessary, add a drizzle of olive oil. You don't necessarily want the bacon to turn "crisp." This is easier to do if the bacon is a thick slice or if your are using smoked hog jowl. When mushrooms have yielded their liquid and reduced, remove to a bowl.

Smoked, sliced hog jowl is cheaper than bacon and,
in my opinion, better. The fat is "buttery."

Add a bit of olive oil and butter to pan. When hot, add the leeks and onions, cooking over medium heat until leeks are wilted and the volume is reduced by half. The mixture will just begin to turn a bit brown and leeks will have become soft and pliable. Remove to bowl with mushroom/bacon mixture.


Give the pan a drizzle of olive oil and a bit of butter. Add chicken and quick fry until golden. Don't crowd the pan and do in two batches (which is what I did). If necessary, de-glaze pan with a bit of dry white wine. Remove chicken pieces to separate bowl.


Keeping the chicken in large chunks prevents over-cooking.
Remember, the chicken will also bake in the oven.

When done, add all ingredients back to pan. Add dried thyme and salt and pepper to taste. Simmer gently so flavors meld.


At this point, the mixture may be cooled, covered and refrigerated until the next day.

To make the sauce:

Add butter to a medium pan. When melted, add the garlic and stir until fragrant. You don't want it to brown and if it begins to do so, remove from heat immediately.

Add the flour and stir for about two minutes over medium-low heat to cook out the flour taste. If it turns a bit golden, don't be alarmed.

Now begin adding the milk, a little at a time, stirring constantly with a wire whisk. When tiny bubbles show around the side of the pan, that's a sign to add more liquid. (This is not going to be a super thick sauce.) Add stock a little at a time. When it turns the consistency of heavy cream, add the cheese and stir until melted. Add a few sprinkles of turmeric until it turns light gold in color. Taste for seasonings.

Place meat mixture in a large bowl and begin mixing in the sauce. You may find you don't need all of it. You will end up with a total of about 2.5 cups of mixture.


Distribute mixture evenly among four, four-inch ramekins.

Divide cold puff pastry into four squares. Wet the rim of ramekins and place one square over each pot, pressing down gently around the edge. Cut a vent in the center. (At this point, I only did two and returned the other two to the fridge to prepare the following day.)


Place filled and topped pies in refrigerator while oven is heating.

Preheat oven to 400 F. Place on a baking sheet and bake for about 20 minutes.


Allow to cool a bit before digging in.


Thursday, January 5, 2012

Meatballs

Garlic. Parsley. Cheese. That's a good meatball.


A bad meatball disguises itself as meatloaf. Meatballs should have a certain complexity to their taste, which includes cheese, parsley and lots of garlic. And the mixture should be lightly handled to avoid stone-like balls when cut into. I actually prefer my meatballs served with plain, buttered noodles. But simmering them in a tomato sauce will give an added depth and tenderness.


15 meatballs
  • 1/2 lb. ground chuck
  • 1/2 lb. ground pork
  • 1/3 cup dried bread crumbs
  • 1/4 cup melted butter
  • 2 heaping tablespoons finely chopped curly parsley
  • 1 tablespoon garlic, pressed
  • 1-2 tablespoons grated onion
  • 1 teaspoon Kosher salt
  • 1/4 cup fresh-grated Parmigiano-Reggiano cheese or similar
  • 1/4 teaspoon all-purpose black pepper
  • 1 egg, lightly beaten with 2 tablespoons milk
  • 6 dashes Tabasco Sauce or to taste
  • 3 sprinkles/shakes ground allspice


Melt butter and add to dried bread crumbs. Be sure your parsley is finely minced. If you don't have a garlic press, finely mince your garlic.

Place all ingredients into a bowl and with a wooden spoon or spatula, begin folding and mixing. Avoid using your hands because they tend to squeeze the mixture. You want to keep it as light as possible. Cover and place in refrigerator for a few hours or overnight.


Preheat oven to 400 F degrees.

Lightly spray a wire rack and place it over a sheet pan.

Begin forming golf-ball sized meatballs by gently rolling between your palms. Don't squeeze. Use a light touch.


Place on rack and bake for about 20-25 minutes. If you are going to add them to sauce, bake for about 15 minutes. They will finish cooking in the sauce.


NOTES: If you sub Italian sausage for part of the pork, omit the allspice and/or Tabasco depending on spiciness of the sausage you are using.

Three-Ingredient Tomato Sauce

Unctuous! Great for bread dipping! Keep the pot partially covered
to avoid "stove splatters." Notice the splatters along the edge of the pot. 


This recipe from Marcella Hazan was all over the Internet when it first appeared several years ago. Most people "swooned" over its ungarnished simplicity and taste. But, there are those who prepared it and voted it anything but "special."

Me? I'm somewhere in the middle. I have a tough time with any tomato-based sauce since my taste buds recoil at acidity and sourness.

So, in the interest of Internet made-recipes, I made it.

I enjoyed it so much, I made it several times.

This is NOT a spaghetti sauce.

It's not going to have a ton of flavors like most pasta sauces, but that's the point. So, move on.

I thought maybe I'd miss garlic, but I didn't. Many people do not discard the onions but blend them in with the sauce. An immersion blender makes easy work of it.

My favorite way to eat this was simply dipping in pieces of torn bread to hold the unctuous sauce.

And, when I paired it with meatballs, it was really all I needed. It complemented the savory meatballs perfectly without stealing the show the way some sauces can.

I've always added butter to my tomato sauce. It just makes it more mellow, and I'm not ready to throw out my standard tomato sauce recipe for the acidic impaired. Or my jar of RAO.

So, will I make it again? Yes, especially in the summer when I have fresh basil at hand.


I love a can with great, colorful graphics.
These are actually produced in Indiana
and get consistently good reviews.


  • 1, 28 ounce can plum tomatoes, such as Muir Glen or Tuttorossa or
  • 2 lbs fresh tomatoes, peeled or not is up to you 
  • 5 tablespoons butter
  • 1 medium onion peeled and cut in half

Place tomatoes in a heavy pan. Add the butter and onions. Bring to a simmer, occasionally breaking up the tomatoes, and cook for about 45 minutes to an hour or until you notice the yellow sheen from the tomatoes releasing their fat. (I kept the pot partially covered). Remove and discard onion.

I like the onion. A lot will simply 'melt' into the sauce. Some people blend it all up. Some people remove it and serve on the side. You do you.

Salt: If you use canned tomatoes, they may already contain salt. If using fresh, they will not. Add salt to your taste.


(Notes: It's important to use a heavy-bottomed pan. You want a good, constant simmer so the the tomatoes thicken up. Use real butter. The recipe suggests San Marzano tomatoes, but, to tell the truth, I sometimes find them "watery.")


Tuesday, January 3, 2012

Scrambled Eggs


Eggs are amazing; their versatility, endless; their culinary requirement, a necessity. They take up little storage room and their shell is their own packaging! They are a powerhouse of protein, vitamins and amino acids. A large egg is only about 70 calories. They are, in fact, one of the healthiest foods to eat.

The "scramble" in scrambled eggs is a bit of a misnomer. You only want to "scramble" the eggs before cooking them. Once they hit the pan, you want to FOLD them so they keep their light, airy texture. I prefer mine on the custardy side, not overdone.

The addition of three ingredients elevates this humble food to a more adult level: cream cheese, green onion, Tabasco sauce. I used a chive/onion-flavored cream cheese, but plain is fine, too. (Scrambled eggs with a glass of Champagne is a killer!)


  • 3 eggs
  • 1 teaspoon finely minced green onion
  • 1.5 tablespoons cream cheese, room temperature
  • 4-6 drops Tabasco sauce
  • Salt & pepper to taste

In a small bowl, add the green onion to the cream cheese and blend well. Set aside.

In another small bowl, beat/scramble the eggs using a whisk or hand beater until lemon in color, light and frothy and no egg white is visible. Mix in Tabasco.

Melt a bit of butter in a non-stick pan over medium-low heat. Add egg mixture and then dollops of the cream cheese mixture. When eggs begin to set, begin folding with a spatula and gently working in melted cream cheese. 


Eggs should still appear a bit "wet" when done. Slide onto a plate. Salt and pepper to taste.

Notice the "folding" ripples
and the creaminess of the cheese.


Notes: I used Kraft Philadelphia Cream Cheese flavored with onions and chive.


(If you like this recipe, be sure to click the SU submit button below.)
Thanks for stopping by!