Monday, October 31, 2022

Candy Burgers (Maid Rite Hamburgers)


I prefer to 'mandoline' whole dill pickles razor thin and then pile them on.

Somewhere in my Hoosier childhood, I remember a hamburger bun filled with "loose hamburger" meat that was slightly sweet with a hint of tang. I especially loved the savory juices that absorbed into the bun. Think "sloppy Joe" but without tomato sauce crossed with a White Castle hamburger.

I don't really remember any condiments put on the burger. My siblings don't recall such a concoction at all. I honestly do not remember where I had it. I now suspect it was, perhaps, a school lunch at the middle school where I once taught.

Wherever and whatever, I have since learned it is simply called a "loose-meat sandwich" made popular by an Iowa chain called Maid Rite. Most have closed. But their ardent and loyal following is still powerful, and today there are dozens of recipes that swear to be the "original" with ingredients ranging from root beer to dried soup mixes to simmering for hours on end. It's almost a cult following, like one's guarded  chili recipe.

America's Test Kitchen offered their "authentic" version a few years ago (recipe follows). It's not what I remembered, so I played around with it for ages. I thought I had lost my notes and recipe; but, happily, I recently found them hiding in a computer file I never finished.


This is quite easy. The key is to use great hamburger meat. Ground hamburger (you never really know what you are getting in it anymore) is now so expensive that I simply pass it up and buy the fresh, pre-formed hamburger patties produced by small companies who use quality meat. It's worth it.

Also, the key is the ratio of sugar to vinegar. Too much sugar results in a too-sweet burger. But, guess what? It's delicious! Just add more mustard and dill pickles. If not your taste, trust me, kids will eat them up!

The traditional topping is a spider-web squirt of American yellow mustard and dill pickles. Maybe some extra tiny diced onions. That's it. No ketchup. No mayo. No cheese. I prefer to take a whole dill pickle and slice it razor thin on a mandolin and then pile it on the burger. It's much easier to bite into and to chew. You will never go back to jar-sliced pickles.

If you have the time, soak the dried onion flakes in the beef broth until they are hydrated. 
  • 1 pound 80/20 ground beef
  • 1-2 tablespoons dried/minced onion flakes
  • 1 good tablespoon apple cider vinegar
  • 3-4 teaspoons brown sugar (start with less)
  • 1/3 cup beef broth
  • 1-2 tablespoons water (start with less)
  • salt/pepper to taste
  • American yellow mustard
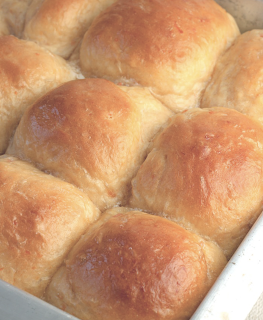
  • Slider buns (not Hawaiin)
Simply add all ingredients to a pan and cook on med/low heat until everything is cooked through. Taste and adjust your seasonings. Allow to slow simmer about 20 minutes, giving a quick stir every once-in-a-while, adding more liquid if necessary. You want loose and wet.

When ready to serve, place a slider bun cut side down over the meat and allow to steam for 30-60 seconds.  Pile with meat. Squirt on some mustard, add the sliced dill pickles, top with bun and enjoy with a hefty side of salty chips or crispy fries. Add a cold fizzy soda or a beer ... 


Here is America's Test Kitchen recipe:
  • 1 pound 85 percent lean ground beef
  • 1/4 cup water
  • 1 tablespoon yellow mustard, plus extra for serving
  • 1 teaspoon sugar
  • 1 teaspoon each salt and pepper
  • 1/2 cup finely chopped onion
  • 4 hamburger buns
  • Sliced dill pickles

Update: 11-10-22
Since posting this, a friend e-mailed that, indeed, a Maid Rite was once in the county of Indiana where I grew up, so that must be where I had these and/or my mother made them from memory since the diner was not close to our house. Mystery solved!


Sunday, October 23, 2022

Pumpkin Breads, Toppings, Glazes

I love a quick bread. No yeast. Just mix and bake. Maybe drizzle with a frosting. Slice and serve. Good with your favorite cuppa in the the morning, an afternoon snack and quick dessert that is easily jazzed up.

With summer on the run, everyone is on the pumpkin wagon. It's amazing the pumpkin concoctions they invent from drinks to meats! Me? I'll stick with the traditional. And nothing gets better than pumpkin bread!

There are a ton of recipes, but I have settled on just two that I want to share. If you, too, are on the lookout for something a bit out of the ordinary, I urge you to give them a try. Neither one is greasy from an overabundance of oil added to the recipe. Both use a full can of pumpkin--not a partial can. Both have a baked topping. And both rise nice and high. I have also added a few "topping" ideas.

Feel free to fuse the two together to get your own hybrid. I often do.


First up is Deb Pearlman's pumpkin bread from her site "Smitten Kitchen." If you don't know it, you are in for a lovely visit! In on-line tests, some have dubbed this the BEST pumpkin bread. 

Using a 6-cup loaf pan, it makes a hefty load, so be prepared. Some use a smaller pan and use the excess batter to bake off cupcakes. If you do, vary baking times and test for doneness! I use half oil and half butter.

  • 1 15-ounce can (1 3/4 cups) pumpkin puree
  • 1/2 cup (120 ml) vegetable or another neutral cooking oil or melted butter (115 grams)
  • 3 large eggs
  • 1 2/3 (330 grams) cups granulated sugar
  • 1 1/2 teaspoons baking powder
  • 3/4 teaspoon baking soda
  • 3/4 teaspoon fine sea or table salt
  • 3/4 teaspoon ground cinnamon
  • Heaped 1/4 teaspoon fresh grated nutmeg
  • Heaped 1/4 teaspoon ground ginger
  • Two pinches of ground cloves
  • 2 1/4 cups (295 grams) all-purpose flour
  • TO FINISH
  • 1 tablespoon (12 grams) granulated sugar
  • 1 teaspoon ground cinnamon


Heat oven to 350 degrees F. Butter a 6-cup loaf pan or coat it with nonstick spray. (A doubled version will fit a 12-cup bundt pan, btw.)

In a large bowl, whisk together pumpkin, oil, eggs and sugar until smooth. Sprinkle baking powder, baking soda, salt, cinanmon, nutmeg, ginger and cloves over batter and whisk until well-combined. Add flour and stir with a spoon, just until mixed. Scrape into prepared pan and smooth the top. In a small dish, or empty measuring cup, stir sugar and cinnamon together. Sprinkle over top of batter.

Bake bread for 65 to 75 minutes until a tester poked into all parts of cake (both the top and center will want to hide pockets of uncooked batter) come out batter-free, turning the cake once during the baking time for even coloring.

You can cool it in the pan for 10 minutes and then remove it, or cool it completely in there. The latter provides the advantage of letting more of the loose cinnamon sugar on top adhere before being knocked off. 

Deb says, "Cake keeps at room temperature as long as you can hide it. I like to keep mine in the tin with a piece of foil or plastic just over the cut end and the top exposed to best keep the lid crisp as long as possible."

If you go to the Smitten Kitchen website, the comment section has loads of tips. 

💖💗💖💗💖💗💖💗💖

Next is America's Test Kitchen version. It is a little fussier, as most of their recipes tend to be. Still, it is way better than most. I like the combo of melted butter/cream cheese/oil/buttermilk. This uses walnuts. I have also used black walnuts. People have also added cranberries and candied ginger.

This recipe suggests first cooking out the pumpkin puree which gets rid of the "tinny" taste and imparts a deeper flavor. You decide. I do it because it makes it easier to mix in the cream cheese.


  • Topping:

  • 5 tablespoons light brown sugar or 2 1/4 ounces, packed
  • 1 tablespoon all-purpose flour
  • 1 tablespoon unsalted butter, softened
  • 1 teaspoon cinnamon
  • 1/8 teaspoon salt

  • Bread Batter:
  • 2 cups all-purpose flour (10 ounces)
  • 1 1/2 teaspoons baking powder
  • 1/2 teaspoon baking soda
  • 1, 15 oz. can pumpkin puree
  • 1 teaspoon salt
  • 1 1/2 teaspoon cinnamon
  • 1/4 teaspoon ground nutmeg
  • 1/8 teaspoon ground cloves
  • 1 cup white granulated sugar (7 oz.)
  • 1 cup packed light brown sugar (7 oz.)
  • 1/2 cup vegetable oil
  • 4 oz. cream cheese cut into 12 pieces
  • 4 large eggs
  • 1/4 cup buttermilk (shake the carton)
  • 1 cup walnuts, toasted, chopped fine

The test kitchen’s preferred loaf pan measures 8 1/2 by 4 1/2 inches; if using a 9 by 5-inch loaf pan, start checking for doneness five minutes early.

FOR THE TOPPING: Using fingers, mix all ingredients together in bowl until well combined and topping resembles wet sand; set aside.

FOR THE BREAD: Adjust oven rack to middle position and heat oven to 350 degrees. Grease two 8 1/2 by 4 1/2-inch loaf pans. Whisk flour, baking powder, and baking soda together in bowl.

Combine pumpkin puree, salt, cinnamon, nutmeg, and cloves in large saucepan over medium heat. Cook mixture, stirring constantly, until reduced to 1½ cups, 6 to 8 minutes. Remove pot from heat; stir in granulated sugar, brown sugar, oil, and cream cheese until combined. Let mixture stand for 5 minutes. Whisk until no visible pieces of cream cheese remain and mixture is homogeneous.

Whisk together eggs and buttermilk. Add egg mixture to pumpkin mixture and whisk to combine. Fold flour mixture into pumpkin mixture until combined (some small lumps of flour are OK).

Fold walnuts into batter. Scrape batter into prepared pans. Sprinkle topping evenly over top of each loaf. Bake until skewer inserted in center of loaf comes out clean, 45 to 50 minutes. Let breads cool in pans on wire rack for 20 minutes. Remove breads from pans and let cool for at least 1½ hours. Serve warm or at room temperature. 

                     ðŸ’–💗💖💗💖💗💖💗💖

MAPLE GLAZE

If you want to forgo the toppings used above, I also enjoy this thick glaze which is also appropriate for many quick breads or cakes that are pumpkin, banana and/or apple based. 

  • 1 cup confectioner's sugar, 100 g (sift after measuring)
  • 2 tablespoons olive oil
  • 2 tablespoons real maple syrup
  • 1-2 tablespoons hot water (use a little at a time!!!)
  • Pinch of Kosher salt
  • Chopped pumpkin seeds (optional)
  • 2-4 drops imitation maple flavoring (optional)

In a small bowl, mix sugar, olive oil and maple syrup. Add just one tablespoon of the hot water. Taste. If needed and if using, add a few drops of the maple flavoring. For the second tablespoon of hot water, only add a little at a time. You want a glaze that is somewhat thick, not runny.

Carefully spoon over the cooled loaf so some runs down the sides. Sprinkle with pumpkin seeds. Allow to sit for 20-30 minutes before slicing.


Wednesday, August 3, 2022

Peach & Pistachio Crumble with Elderflower Cordial


When the cooking show "Sorted" showed up on You Tube, I was an avid fan. I appreciated their antics but, more importantly, their creative and simple approach to food to encourage younger people to get into the kitchen to cook.

 This is such a recipe.

As I write this (July 2022), I am sad to say I no longer have this recipe. It may be on my older computer. I will search. The You Tube channel I reference is, however, still on line and running strong, but it no longer, for some reason, is posting its older recipes. Only the videos.

Even if I find the recipe, (found it!)  and even if you choose not to make it, that is fine. My real purpose in posting this "recipe" is because of the single ingredient of elderberry flower liquor which I urge you to try.

Until I lovingly stumbled upon this particular recipe, I had no idea elderberry liquor even existed. Please, DO NOT confuse this dew from the gods with elderberry syrup. It's not the same. The only time I buy it is during peach season. It's a match made in heaven ... 

A tad sweet, it is wonderfully floral. Sometimes, I simply spoon a bit over incredibly ripened peaches and go from there...  It is a great ingredient for cocktails ... think bubbly champagne and a slice or two of golden peaches.

In other words ... This is all about the booze! I make no apologies. It's not the easiest to find ... The most expensive, from France, is called "St. Germain." The bottle itself is very French: gorgeous and sexy. But at forty bucks and/or over ... well ... come on now. Luckily, I found an American alternative from Washington State at half the price but just as wonderful and both are "saintly." It's your call.

Use ripe but firm peaches. Shortbread cookies are easier to find in England than here in the States. Here, your choice is the pricey imported Walkers. I have used Lorna Dune and Pepperidge Farm "Chessmen" cookies. I once tried vanilla wafers, but they don't keep their crispiness and turn soggy. If you are adventurous, just make your own. The ingredients are few, but the taste beats any store-bought cookie. I once saw a recipe for rosemary shortbread cookies. Now, how great would those be? Serve one on the side ...

This is an elegant, simple dessert for a light summer dinner party. Serve in champagne glasses or other "stemmed" dessert ware.


  • 4 medium ripe, yet firm peaches, unpeeled
  • 1 shot elderflower cordial (I suggest more)
  • water
  • 1 handful shelled pistachios salted or unsalted
  • 25 g.butter, melted (2 T)
  • 120 g. light brown sugar (about 1 cup) see note below in directions
  • 1 tablespoon flour, AP or self-rising
  • 50 g. shortbread cookies, roughly crumbled. You don't want sawdust. (4T)

Cut peaches into quarters. Place in a medium saucepan. Add elderflower cordial and then top with water just until peaches are covered. Bring just to a simmer for a few minutes. Remove from heat.

Chop pistachios. Place in a small bowl. Add brown sugar, flour and crushed shortbread cookies. Mix. Drizzle in the butter. NOTE: I'm never quite sure about the brown sugar measurement. In the video, it simply looks like they use Demerara or raw sugar. I use light brown sugar, but don't pack it down. Seems to work fine.)

Place half of peaches in medium bowl. Tip in some of the syrup (it will be pinkish). Top with crumble mixture.

Place on a sheet pan or tinfoil to catch any drips. Bake at 355 F (180C) for about 15 minutes until topping is golden and edges bubbly.

Bring to room temp. Serve with additional shortbread cookies and a spoonful of fresh whipped cream or vanilla ice cream.


Friday, June 24, 2022

No-Bake Blueberry and White Chocolate Cheesecake!

One thing I love about living in the South is listening to mockingbirds. They are incredible. And if you are lucky enough to have one become your neighbor, you will never be bored. Their vast repertoire of calls is amazing. This spring, I listened to one that belted out the siren of a car alarm ... over and over but with a wonderful melody.

 When I tended seven feral kittens behind the grocery store where I worked, a mockingbird accompanied all of us during the warmer months, flying from light post to light post, singing and dancing. Yes, they tend to dance as they sing ... up and down with a flutter of their wings!

A southern disappointment, however, are berries. I think the heat robs them of their delicate but unique robust taste. There is always just something missing ... I find this especially true of blueberries. In Michigan, one of the leading blueberry producers in the country, I could pretty much depend on great-tasting blueberries most of the summer season. 

Here, in North Carolina, while blueberries are plentiful, the taste quality is hit-and-miss. And forget South American blueberries which are now flown in year-round. They are blueberries by name and sight only. Not taste.


Which brings me to this dessert. It has been on my "to make" list for years. But it is paramount you have fresh, non-mushy, plump, sweet and great-tasting blueberries. Frozen will not work. 

If you have never met Donal Skehan, I introduce him to you in the video below. I hope you follow him regularly. He has some great, non-complicated recipes. He has a beautiful family and it's always a privilege when he allows viewers to tag along on family jaunts and celebrations.

What attracted me to this particular no-bake cheesecake is the inclusion of melted white chocolate. Brilliant! Also, it has no added sugar and a minimum of Philadelphia cream cheese. 

We are approaching peak blueberry season, so I have been scouting all my grocery stores for the best-tasting blueberries possible. I have my white chocolate and digestive biscuits in the baking cupboard waiting ...

Donal says you can also use strawberries ... but, like blueberries, they should be the BEST ever.

I suggest you use weights, not measurements. I know, a bit of a pain. Cream cheese comes in 8, not 9-oz blocks. To make up, maybe use a bit more white chocolate. 

  • 200 g or 7 oz. plain, digestive biscuits or graham crackers
  • 100 g or 3.5 oz butter
  • 400 g or 14 oz. good-quality white chocolate, roughly chopped
  • 250 g or 9 oz. full-fat cream cheese
  • 250 ml or 8.5 oz double cream
  • 250 g or 9 oz mascarpone cheese
  • 250 g or 9 oz. blueberries
  • 1, 8-inch non-stick springform pan

Melt the butter. Add the biscuit crumbs and mix to combine. Pour into the base of the springform tin and press down with the back of a spoon. Cover this and place in the fridge to chill while you prepare the rest of the ingredients.

Gently melt white chocolate, stirring occasionally, either over a hot bath or in microwave at 50 percent power.

Beat the cream cheese, cream and mascarpone in a large bowl with a wooden spoon/whisk until well combined.

Stir through the white chocolate.

Fold in  blueberries.

Spread mixture evenly over the top of the biscuit base. Cover and place in fridge for at least two to three hours or until set.

 Overnight is best.

Remove the cheesecake from the tin and serve.

Meet Donal: 


Wednesday, June 8, 2022

Woolworth's Ice Box Cheese Cake

America is known for its diners, soda fountains and, when they reigned, department-store luncheonettes. 

Sadly, this epoch of Americana has all but disappeared. Some, like Woolworth's, are simply gone forever.

I'm from NW Indiana, a stone's throw from Chicago. I well remember luncheon and soda fountains at such grand department stores as Marshall Fields and Carson-Pirie-Scott. Incredible businesses that grew with major American cities. They are now defunct. Carson's was my favorite because they had a small "ice cream shop" that served incredible ham sandwiches and chocolate shakes the likes I could not get in my small Indiana town.

This particular cheesecake was a popular dessert at Woolworth's lunch counter in the heyday of its success. It is simple to prepare. For many it is a nostalgic dessert as they do, indeed, still remember it.

Like all "urban-legend" recipes, it is difficult, in not impossible, to pin down the exact ingredients nor the exact method or way it was prepared. First off, no butter was used in the crust. Lemon juice was not added and rather than use whipping cream, whipped evaporated milk was used. The gelatin of choice was Royal brand, not Jell-O.

I really would not classify this as a "cheesecake" in the strictest sense of the word. It has no eggs. It's more like a mousse ... thicker than a pudding, but not quite dense as a cheesecake. Still, it is worth making for its ease and flavor. It is quite light. And it has survived the test of time!

The original recipe calls for one can of evaporated milk that has been chilled and whipped. That makes sense since it would have been cheaper that actual whipping cream and would have been easier to store for commercial use. Today, not so much. As such, most people simply use whipping cream. I never suggest Cool Whip. There is no need to sweeten the cream or evaporated milk. Here is a tip from someone who actually made this at Woolworth's: 

I worked at Woolco . . . and made this exact
cheesecake every week. We always kept evaporated milk in
the freezer and would take out on the day cheesecake was to
be made, so it could soften, but not defrost completely,
in a semi frozen state. We didn't use lemon juice. And added
vanilla to the cream cheese and sugar mix, and chilled it for
hours before incorporating into milk and jello whip. --J.L.--
          
Interesting, but I do not suggest you do the same. For one thing, the can will explode. Second, companies do not recommend it and freezing will cause it to separate. Instead, open the can and place in freezer for about 30 minutes before using to get it good and cold. I use this quote as an example of how difficult it is to find exact specifications for an older, urban-legend recipe.

The original also did not call for butter or sugar in the crust. Why pay more? The graham cracker crumbs were simply scattered on the bottom of the pan, quick frozen, and the mixture very carefully placed over the top.  This could be the reason recipes do not call for pre-baking the crust. Me? I suggest you use the butter. It's just easier and, really, there is less waste. Baking it to set up is your decision.

Made in large oblong pans, it was always proportioned as a generous square. Could you substitute different flavors of Jell-O? I do not know, but I don't see why not.

Most recipes call for a 13 x 9 pan. You will have to decide. Square? Round? Thin or thick filling? If you deviate, you will need to adjust the crust measurements.

To sum up, Woolworth's made an effort to serve a great dessert at a great price by utilizing judiciously-priced and great-flavored ingredients. 

At the end, I have posted Miss Lori's video from Whippoorwill Hollow over on You Tube and her wonderful  recollections of Woolworth's and how she makes this dessert. Follow whichever method/tips you prefer. Please note, her newspaper clipping recipe is for a much larger version and goes mostly by the "pound" of ingredients.

And, yes, I well remember "five-and-dimes" as a kid. A quarter went a long way back then--you could buy five peanut butter cups! FIVE! 

Some notes to consider: Lessen water to 3/4 cup for a firmer cheesecake. As noted above, the original did not add lemon juice. Some add a bit of vanilla. It's your call.

  • 3 cups Graham cracker crumbs divided (2 cups, 1 cup)
  • 1 stick melted butter (optional)
  • 8 ounces cream cheese, room temperature
  • 1 cup sugar
  • 3-5 T. lemon juice (optional)
  • 1, 3-ounce Royal lemon gelatin powder (Jell-O)
  • 1 cup boiling water
  • 1 can evaporated milk that has been put in freezer for about 30 minutes
  • OR
  • 1.5 cups cold whipping cream (see notes above)
  1. Pour boiling water into a bowl containing Jell-O mix. Stir until dissolved. Set aside to cool a bit.
  2. Mix two cups cracker crumbs with melted butter. Press into bottom of pan.
  3. In a medium bowl, mix cream cheese, sugar, and lemon juice. 
  4. In a cold bowl with cold beaters, beat the cold evaporated milk until thick.
  5. Blend in cooled Jell-O mixture into your cream cheese mixture. Fold until no yellow streaks remain.
  6. Now fold in your whipped milk or cream mixture.
  7. Spread evenly into pan with crust. Sprinkle with remaining cracker crumbs. Chill for several hours. Overnight is best.

Friday, June 3, 2022

Carlota De Limón (Mexican Lime Icebox Cake)

Make it as fancy as you would like!

While it is traditional to use limes for this simple "cake," lemons may be substituted, or a combination. But I recommend the limes, even key limes.

Until I laid my eyes on this dessert, I had no idea what Maria cookies were. They are easily found in the Hispanic section of your grocery store, they are also referred to as a "biscuit" or "digestive cookie." Usually inexpensive, they basically taste like an American animal cracker/cookie. They are sold in individual 7 oz. packages or tubes or you can purchase them by the box which usually have four rolls or tubes, sometimes more. I now always keep a pack or two on hand if only for a quick snack. They also make for quick and easy ice-cream sandwiches if you have kiddos around.

Layered between this citrus custard, the cookies absorb the moisture to transform into a delightful cake-like dessert that is fresh and appealing. 

You may assemble this in a square or round pan. I prefer a round spring-form pan. The size will depend on the height you wish to build up the "cake." For beginners, I suggest an 8-inch square pan.

Like the previous lemon dessert, this, too, depends on the magic of adding an acid (citrus juice) to dairy, in this case condensed and evaporated milk to create a thick custard. Today, sadly, neither are cheap. 

I have seen recipes with as little as one-half cup of juice to as much as 1 cup. It will depend on your individual taste and pucker tolerance. Start with 1/2 cup and taste as you go. You will need at least one-half dozen limes of a decent size. Be sure to give them a good wash.


  • 1, 12 oz. can evaporated milk
  • 1, 12 oz can sweetened condensed milk
  • 1/2-1 cup freshly squeezed lime juice
  • 1/2 teaspoon vanilla
  • 2 packages Maria cookies (or enough to fill pan/dish of your choice)
  • 1 8-inch square pan or dish

Place liquid ingredients into a blender and blend/pulse until mixture has thickened. Do not overblend or you will end up with too many bubbles.

Place a few tablespoons into the bottom of your pan. Neatly place one layer of cookies on top. Repeat. The custard layers will not be thick. It's basically a "glue." End with custard layer. If needed, break some cookies in half. 

Cover. Refrigerate until solid, preferably overnight.

Decorate with lime peels and/or whipped cream and slivered almonds--even clean floral petals.

Covered, this will keep for a day or two. After that, it gets a bit too soft and "mushy." But it never lasts that long. 

Below is a video to give you a bit instruction. Enjoy!


Wednesday, June 1, 2022

Blender Lemon Pie (4 Ingredients)

Whipped cream makes an even better topping!


Over the course of the next week or so, I am going to post daily recipes for lemon desserts. Some I have made. Some I intend to make. All are unique in some way and most are not complicated. It's time to empty my file.

Lemon and summer just go together--yellow sunshine. Did you know that Van Gogh's favorite color was yellow? 

After a heavy dinner from the barbecue, a light lemony dessert is always appreciated. Even if you are cooking light and eating light, a lemon dessert is perfect. To me, it always borders on the more mannerly side of desserts. Always a bit elegant ...

This first one is entirely concocted in a blender! The blender makes easy work of macerating the entire lemon and homogenizes it with the rest of the ingredients for a smooth filling. Feel free to use a graham-cracker crust.

 Can you use a food processor? I do not know. But, you can not use a hand-held mixer! 

The darker your egg yolks, the deeper yellow it will color your pie. This is a fun pie to decorate. Do use whipped cream. Berries make a nice addition. Use sliced strawberries, whole blueberries or raspberries.  Dot with small mint leaves. Enjoy!

1 large lemon, well washed under hot water but not peeled
4 large eggs, room temperature
1 stick unsalted butter, melted (8 tablespoons)
1.5 cups white sugar
1 8 or 9-inch piecrust, partially baked in a 350-degree oven
Whipped Cream for topping
Assorted berries or fruit

Slice lemon in half. Do not peel. Cut each half into eight sections. Remove all seeds. Place in blender. Add eggs, butter and sugar. Blend until smooth.

Pour into pre-baked pie shell. Bake at 350 F for about 40 minutes or until set. Allow to reach room temperature. Refrigerate until totally chilled. 

Now, how easy was that?


Friday, May 13, 2022

Butter-Basted Fish Fillets with Garlic and Thyme

Delicate. Buttery. Delicious!


I have now made this several times and I am hooked (pun intended)!

It is more of a method than a recipe. The key will depend on the freshness of your fish. Avoid frozen, since they tend to be mushy when thawed.

2, 6-ounce fresh cod fillets, skinned, at least one-inch thick, 
    patted dry 
Salt and Pepper
2 garlic cloves, smashed, peeled, but not minced or cut
3 tablespoons firm butter
2 thyme sprigs
1 tablespoon vegetable oil
1 non-stick skillet

Add vegetable oil to skillet. When hot, add fillets, skin side down. Lower heat to medium. Cook 4-5 minutes. Carefully flip and cook other side for one minute. Add butter and begin to baste by tilting pan and basting for 15 seconds then leaving flat on stove for 30 seconds. 

When temperature reaches 130 degrees, add garlic cloves and thyme sprigs. (I simply add the garlic and thyme sprigs when I add the butter). Continue cooking until fish registers 136-140. 


Carefully remove from pan. Spoon over the butter sauce. Serve with a wedge of lemon. For sides, I like plain white rice with spinach and a bit of parmesan mixed in. It goes nice with the butter sauce.


Wednesday, May 11, 2022

McDonald's Original Fries (and the truth about FATS and OILS)

Most mornings I spend several hours scouring the Internet for new recipes to keep me mo-tivated. As you can imagine, I have a file that is overflowing. Several, in fact. Will I make all these recipes? It is impossible.

Be that as it may, I've decided to post and share those I find interesting, even though I have not prepared them. 

I begin with fries.

Not any fries, but McDonald's fries which, if you are as old as me, you remember fondly opposed to the limp ones served today. Often cold.

But first, let's talk lard and fat. Lard is from pigs. Tallow is from beef. People often use the terms interchangeably. That is not correct.

I love lard and use it often, along with bacon grease. Here are some facts to consider: The newer lards are much healthier then they used to be.  I use it in biscuits, pie crusts, and to grease bread pans and casserole dishes.

 One tablespoon of lard has 10 mg of cholesterol. By contrast, one tablespoon of butter has 30mg of cholesterol. What about fat content? Well, one tablespoon of lard has 13% fat, of which six is saturated fat. By contrast, one tablespoon of butter has 11% fat, of which seven is from saturated fat. One tablespoon of margarine has 11% percent fat of which 2.1% is saturated but contains no cholesterol. One tablespoon of Crisco all-vegetable shortening is 12g of total fat of which 3 is saturated fat but contains no cholesterol.

Monday, April 25, 2022

Chicken Thighs with Butter Beans

I needed to use up a couple of chicken thighs and some aging veggies hiding out in the crisper drawer. So, I made this. It did not disappoint. It's more of a "method" than an exact recipe and the way I prefer to cook. 

  • 2 bone-in, skin-on chicken thighs
  • Chicken seasoning of your choice (I use Bell's)
  • Bacon fat
  • Butter
  • 1 leek, sliced, white part only
  • 1 carrot, thinly sliced.
  • 1 rib of celery, thinly sliced
  • 1 large garlic clove, peeled, thinly sliced
  • Dried thyme
  • Salt and pepper
  • Chicken stock (about 1/3 cup)
  • Dry white wine (about 1/3 cup
  • 1 can seasoned butter beans, rinsed and drained (I use Margaret Holmes brand)

Preheat your oven to 350-375 F.

Pat dry your chicken thighs. Sprinkle the underside with your choice of chicken seasoning, salt and pepper.

Add about 1 tablespoon each bacon fat and butter to a medium, heavy pan. When melted and hot, place thighs skin-side down. Lower heat to medium. Do not fiddle with them. When browned, carefully flip and brown other side. Remember, these will cook in the oven, so they do not need to be cooked through.

Remove thighs from pan. Add a bit more fat to the pan. Gently sautee your vegetables. Add chicken stock and wine, scraping up the brown bits. Allow to reduce a bit over medium low heat--until you no longer smell the alcohol in the wine. 

In the same pan or a casserole dish, layer the butter beans. Top with the vegetable mixture. Add a bit of salt, pepper, dried thyme. Tuck in the browned thighs. 

Cover and bake 45 minutes. Uncover. Bake another 10 minutes. If the tops are not as browned as you like, place under broiler. If you use the broiler, do not walk away and keep an eye on it the entire time.

Allow to cool a bit. Serve.

  1. Notes: I buy my bacon fat. I used to get it over Amazon, but now one of my supermarkets carries it. The brand is called "Bacon Up" and I love it. It is triple filtered but retains the bacon taste.
  2. Leeks bring a dish a lot of flavor. One could substitute shallots, even onions in a pinch.
  3. To the wine/stock mixture, one could also add a bit of Half-and-Half or cream. 


Thursday, March 31, 2022

Mayonnaise Muffins (Three-Ingredient Muffins)


Who knew? A simple muffin transformed into a bagel. Yes, you can do it, too!
Don't be a bagel snob.


I've seen versions of this recipe floating the Internet for awhile now, so I thought it time to give it a try. I'm always on the prowl for an easy "bread" that is table-presentable even for company.

This did not disappoint. It's a keeper. But I do suggest you give it a trial run, first.

Is it celebatory fireworks worthy? Not really. But it is simple. It's good. And it fills a need.

This most common of these recipes goes by the title "Three-Ingredient Muffins." But I have also seen people roll them like a "biscuit"! (I don't know why, since that defeats the ease of the recipe and easy clean up.)

After reading many reviews with so many changes, I settled on the one below. I baked mine in a "mini" muffin tin that fit into my counter-top oven at a lower temperature but for around the same time if they had been regularly sized. I also added a bit of sugar. And I took one reviewer's advice and added just a few pinches of yeast.*  It's important to let these sit for about 15 minutes before baking, a good rule for any muffin to give them a head start to rise.**

For half, I sprinkled with "everything bagel" toppings. I enjoyed them very much split open, smeared with a bit of cream cheese and topped with smoked salmon. For a "dinner" roll, the savory route of planting seeds in a pillowy and fertile loam of dough is the the way to go. One could just as easily use caraway or sesame or any favored dried herb, such as dill to match the occasion and taste of the main dish. Even seasoned pepper--such as my favorite, Aleppo.


(Please note: not all bagel seed toppings are the same. I prefer brands that include some type of salt. If yours does not, I suggest you add to it a bit of sea salt, pink salt or Kosher salt.) 

Because I live in the South, I am spoiled and used White Lily self-rising flour. If you do, too, adjust amounts as recommended on package. If you do not have self rising flour on hand, simply add, for each cup of all-purpose flour: 1½ teaspoons (6 grams) baking powder and ¼ teaspoon (1 gram) kosher salt.

If you want these for a breakfast or morning muffins, measure dry ingredients into a bowl the night before. In the morning, sleepy-eyed and groggy, it's easy to add wet ingredients and pop into the oven while prepping your coffee or breakfast. I even grease the tins and measure the milk in a mug the night before. Really, what could be easier?

Don't be put off the mayo. It contains oil and egg. That's it. If you have never had a mayonnaise cake, you don't know what you are missing! Very moist and tender.

For the future, it would be interesting to add a cinnamon streusal in the center and/or top. Lots of variations one could use for these ... Add cheese, pieces of sausage/bacon. Some pieces of fresh fruit. It's a great and easy base for creative cookery. And it's cheaper than a loaf of good bread or a slice of cheap bread.

  • 2 cups self-rising flour
  • 1.5-1 teaspoon sugar (optional)
  • 4 tablespoons full-fat mayonnaise
  • 1 cup whole milk 
  • Bagel seed topping (optional)

Place dry ingredients into bowl. Mix. Add mayonnaise and incorporate. Add half of the milk. Stir. 

Continue to add milk until you get a thick, pancake-like batter.

Spoon into greased muffin tins. Allow to rest 10-15 minutes. Bake in a 375-400 degree oven 13-15 minutes.

Remove from oven. Allow to cool a few minutes. Tumble onto a rack to cool.

This little  puppy outdid everyone in the pan!
(Did it rise/raise/rose?)


Notes: The muffin tin I used is visually attractive. My mom had several. But the muffins picked up the "tinny" taste. 

*These really do have a nice texture. Sadly, the yeast added no taste.


**RISE ROSE RISEN are verbs. They simply discuss "action." Just think of Jesus. He has "risen." He "rose" He will "rise" again. In other words, a person or thing MOVES UP! Words like am, is are, was, were, being, been and has, had, will ... are clues or helping verbs that you want one of these words.

But "raise" must always have an attachment or "object" telling you what is actually "raised." They "raised" the rent. "Raise" your hand. The committee "raised" a number questions? That's it ... just two words ... raise and raised unlike RISE which has three conjugations but a ton of helping verbs.  

If you would like a week-long lesson on this, let me know!


Saturday, March 12, 2022

Lunch Lady Hot Rolls~

I was raised a Baby-Boomer Catholic. 

That meant several things. First, I went to Catholic or private schools, not "public." My church and school was ST. JOSEPH in the small town of Dyer, Indiana. I loved that small town! It was once a beautiful church until pagans remodeled it. Very, very sad.

In the 1950s, there was a clear divide between Catholic and "public." For example, we were not allowed to walk in front of the "public" school. We had to cross the street! I'm serious!

Even though "public" school busses took us to school and back, we were not allowed to sit with any of the "public" school kids.

School lunches at private, Catholic schools were pure torture for any child.  There was no federal or state money or aide. No menus or recipes. They were just terrible. At best, food was donated. Lots of cans. I honestly do not remember anything FRESH or made from scratch, except peanut-butter cookies. It was cheap. It was garbage. 

For the most part, my siblings and I had "packed" lunches prepared by our mother. Back in the cafeteria, kids who had packed lunches ... were separated from kids who had "HOT" lunches. Note the dichotomy ... Hot/Cold ...

The worst was the Friday lunch. We were not allowed to eat meat on Friday's ... so the lunch was always the same ... ALWAYS! Putrid fish sticks (often cold), canned peas, a piece of cheap mostly-stale white bread and a pat of "butter" that was so dense it ripped the bread when you tried to spread it. The redeeming ingredient, hopefully, not always, was a peanut butter cookie.

Well, come Friday, my mom was done making lunches for me and my brother and sister. Instead, she gave us a quarter to buy our lunch, and sent us on our way ...

It was a death sentence. The worst lunch of the week.

Nuns served as guards next to every garbage can to make sure every child ate everything (even if we had a home-packed lunch.) There were "children in the world starving to death," they loved to remind us.

Well, from Grade One I learned early. Screw that piece of white crappy bread. I stuffed it in my pant pocket. Canned peas and horrible "fish" sticks? Drain carton of milk ... and stuff it into that. Out of sight--out of mind. The nuns smiled. And I was cleared to leave cafeteria prison to enter playground freedom ... regardless of starving children in the world.

I can't begin to tell you how often my mother yelled at me ... when she went to do laundry ... and stale bread fell out of my pant pocket. Looking back, it should have been a wake up call ... NO SCHOOL LUNCH ON FRIDAYS! Better yet ... contact school ... discuss school lunches ... 

I graduated to a classy catholic high school ... Great food! They figured it out ... Make good food ... and reap a profit!

Eventually, I became a public school teacher, in rural Indiana. Many of the lunch ladies were regular moms and moms who worked on farms. They were all good cooks! Sadly the Feds eventually barged in and put an end to home-cooking. It was a horrible period of bad food until everyone eventually figured it all out.

One of my favorite Lunch-Lady foods was yeast rolls, usually served with beef stew! In the mornings, the smell of rising rolls permeated hallways. I once asked the head cook for the recipe and she obliged, but it was the original recipe, 25 lbs of flour, etc. I wish now I had saved it. I have made an effort to contact people who may still have it, but to no avail ... and some have simply passed on.

Lunch-Lady Rolls have become a cult classic in the U.S. Below is a video of a former lunch lady, Miss Lori, from her You Tube channel, Whippoorwill Hollow, making yeast rolls. In other episodes, she also shares recipes for Lunch Lady Pizza and Lunch Lady-Peanut Butter Cookies. She's a great cook! Enjoy!


Saturday, February 19, 2022

Easy Fresh-Baked Bread from Frozen Rolls

I know it sounds weird, but I associate a loaf of fresh bread
with the same joy and satisfaction of holding a newborn. 

My doctor tells me I have a gene that must be very French. Why? My three weaknesses are bread, wine and chocolate. None, of course, diminish weight or waist (or wait and waste!). And good bread needs good butter. Quality butter is not sold in "sticks" like cigarettes. It is sold in a block. A big fat beautiful block of fat! My favorite is, of course, French: "Président." It's a bit saltier than other brands which pairs well with a fresh yeasty-fermented bread. My second choice is Plugra. I avoid Kerry Gold. It's too expensive for what it is supposed to be ... but is not.

Today, many grocery stores bake their own bread not prepared from scratch. Instead, it is baked from dough that has been prepared somewhere else and then frozen and shaped. The destination store will thaw it and proof it in large steam ovens. Then bake it. Easy peasy. Most is pretty good. Very good, in fact. But it will cost you because of shipping!

Some stores bake only a few loaves for just the aroma ... Yes, it's true. Customers go crazy . . . But a lot of bread sold in grocery-store bakeries, which includes rolls, etc., is simply shipped frozen and then put on the shelf to thaw.

The last grocery store I worked for, Publix, actually creates bread from scratch. Now, that is unusual! It results in some incredible bread but, more importantly, it saves on shipping costs! For a while, I was obsessed with my store's rye bread! Because I worked in the deli, right next to the bakery, I could put aside a fresh loaf and have it wrapped in a special bag the preserved the crispiness of the crust! How spoiled was I?


Unlike biscuits, these are not really flaky; instead, they are
light and airy. And, unlike biscuits, they have
that great yeasty taste! 

Early in the morning, one could hear bakers slapping the dough against large wooden counters with iron legs. Several times a week, 50-75-pound bags of bread flour are delivered. 

A loaf of "artisan" frozen bread is now hovering between four to five bucks a loaf! I don't think so. Even at three bucks, I tend to walk away. I wish they would just sell the frozen dough. Sometimes, if you ask the bakery department, they will sell it to you that way ... but don't expect a discount because you have to thaw and bake it yourself.

Prior to the star appearance of artisan loves of bread in a grocery store, I often made my own!  Seriously, it is not that difficult. I use what is called a "poolish" (rhymes with POO-LEASH) and the work is evenly divided between evening and the following morning, making it less complicated and strenuous. It's a great weekend project, and if you or your family has never had homemade bread ... OMG .. y'all are in for a real life-changing experience and you will finally discover the "goddess" distinction you always craved as matron of your home.

I thought of purchasing a bread machine ... but ...  for one loaf a week ... do I really need to go that route? And the consensus seems to be ... use the machine to mix the dough ... but NOT to bake it. So, really, what's the point?

I have a counter mixer with a bread hook, but I still have not used it. Soon, I will have no choice even though it is yet another "contraption" to clutter my limited counter and cabinet space.

Several weeks ago, I found this bag of "dough" in the frozen section of biscuits and rolls and decided to give it a try. The price was certainly right--Less than four bucks!!!


I created my own directions and  put three of the frozen rolls into a greased, small dish, sprayed them with some olive oil, and allowed them to rise. Then I baked them. Wow! They were incredible. Why? It was their distinct yeasty taste. When I was young, I made bread using "cakes" of fresh yeast which are now impossible to find. This had that incredible, old-world, iconic taste! Nice crust. Fluffy interior. 

A communion, a trinity. Perfect with breakfast!
And they sop up egg yolks so well . . .

Today, I just bought my third bag for $2.99 ... But it was raised to 3.69 ... (but on sale.") Still, this is a great bargain! I can get a good two loaves from each bag and then some. It will depend on your loaf pan. I use glass, 7.5 x 3.5 inches. You can use any size pan you want. Be creative. The tighter you pack the frozen dough, the higher it will rise. This is also true of biscuits. You do not necessarily want them to "spread" as much as you want them to "rise."

Here are some tips. I bake mine at 375 convection oven in a glass loaf pan I spray with PAM for about 18 minutes. They release easily ... and I put the "loaf" back on the rack. Turn the oven off and leave it for a good five minutes or so before removing it to cool on a rack. Do not cut into it while hot. You will release the steam which is needed to finish baking.

Frozen dough in a glass bread pan. 
Sprayed with PAM. I do this the night before.


In the morning they have risen. Be Happy!

Sometimes, I take a hunk of cold butter and rub it over the tops of the "bread" like one does biscuits or cornbread. It will melt and dissolve into the crevices--like icicles on a spring day. Remember, icicles have no fat or calories ... We should probably consume more (especially if used to stir a mixed drink)!


Honestly, I would rather make these than canned, refrigerated biscuits.


I don't have a photo of this, but, more and more ... just before baking, I spray the top with olive oil or brush a bit of egg/milk (best "glue") and sprinkle with sea salt. Then I sprinkle on my favorite "Bagel Topping." Definitely "over the top" but so good ... even with a smear of strawberry jelly. 

I have also kneaded this when thawed ... worked in a bit of cheese, chives, green onion, olives, etc. It behaves just like a bread dough would. Very forgiving.

Let me know what you do with it. And, please, send me a photo! Enjoy ...