Saturday, February 5, 2022

Let's Go Shopping, 2

Here are some kitchen treats I have purchased this year. Always fun to spend a lazy morning or afternoon surfing Amazon, etc. I quit my part time employment in November. It was fun to use that paycheck for things such as this ... I may need to ask for it back ....


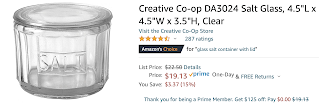
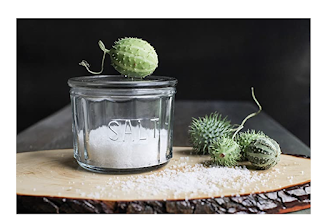
1. Salt Cellar. I have a mini cast-iron, enameled Dutch oven with a lid that I usually keep my salt in. Unfortuanatly, it reacts with our southern humidity and rusts. And it's difficult to clean. So when I saw this heavy glass salt cellar, it fit the bill. It's roomy, heavy, and easy to keep clean.


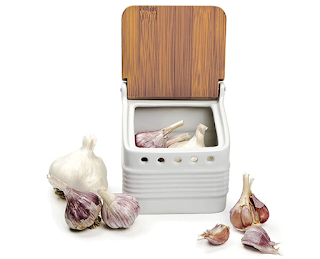
2. I'm forever searching for that bulb of garlic that I know I have ... where did I put it? This beauty solves the problem. Once the bulb of garlic is separated, it keeps the papery skins hidy-tidy inside the box and not all over my kitchen. Plenty of room for several bulbs and/or a few shallots, too. Plus it just looks cool.


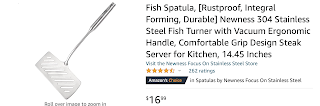
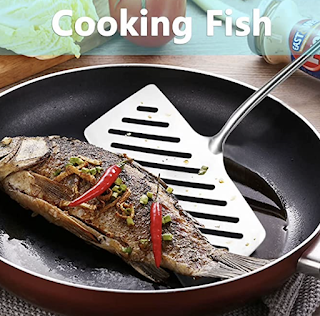
3. Check out this big-boy spatula! I saw an on-line chef use this for fish and I immediately did a Google search. No, it's not something you will use often. It's the tool for the right recipe ... and you'll be glad you have it when you need it


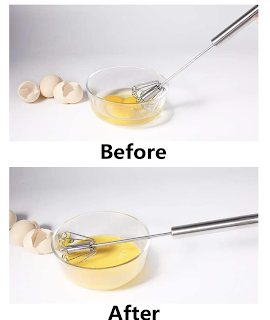
4. I absolutely love this little mixer/whisker. I originally bought it to mix ingredients when I make my soap. But I love it to beat eggs or liquids for a recipe. It kind of works like a top: push down and the tines twirl around and around. Easy peasy. Just be sure to give it a good rinse when you are done and before washing.


5. I love anything Mason and Cash from England. They have unique sizes and their ceramics are well-made and heavy. Since I cook/bake so many smaller-sized recipes, these bakers are perfect. They are very roomy and I like that they are deep. Great for scalloped potatoes, mini Mac-and-cheese, individual apple crisps . . . Getting more and more difficult to find. I'm particularly fond of their "cane ware" which is a basic dark beige.


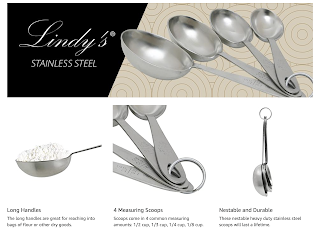
6. I see more and more cooks using measuring scoops instead of cups. And with good reason. They are much easier to use. 


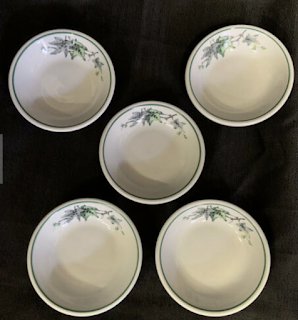
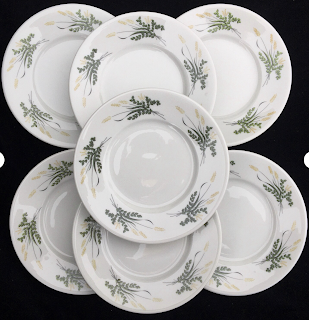
7. I appreciate the sturdiness and versatility of restaurant dishes. Good deals abound. Here are some recent ones I purchased off eBay:

Small "ivy" bowls. So convenient.


Bread plates. These were a bargain!


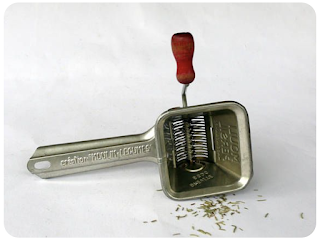
8. MOULIN. A "mouli" is a French vegetable grinder. I have had mine for over ten years and recently the tines bent. Nothing minces parsley better than an old Mouli. Some will say "persil" on them for "parsley." Some will simply say "legumes" for vegetables. If you ever see one in an antique store or thrift shop, grab it! Only wash by hand and dry before storing.


9. I am seeing more and more of this old tinware used in photo shoots. I grew up with it. I have a recipe for rye buns that I plan to bake in this. I have another that holds six. But both fit neatly into my Breville counter-top oven. My mother had an entire collection ... Oh, the stuff we should have taken . . .


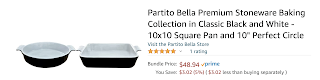
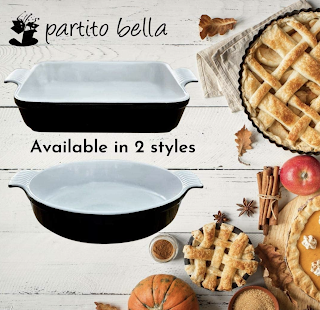
10. I mostly bake in my Breville counter-top oven. In fact, I haven't turned on my large oven for a good ten years and now use it mainly for storing pots and pans. I tend to use pans/dishes that around 10 x 6 or 10 x 7. It can be tricky to find anything larger. So when I saw these two stoneware pieces, I jumped for joy. They were large, deep and roomy. Plus the had handles! A bit pricey, but they are so well made!


Coming up next: New Cookbooks!

Let's Go Shopping, Part I:   http://www.kitchenbounty.com/2019/08/lets-go-shopping-part-1.html


Sunday, January 23, 2022

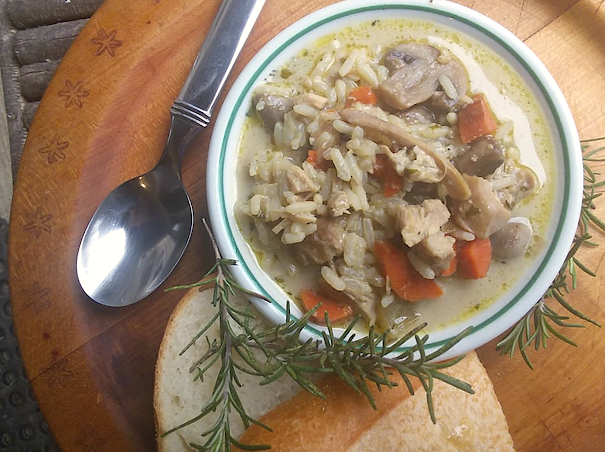
Chicken and Rice (Non-Complicated)

Recipes such as this make for warm, neighborly gifts greatly appreciated on a cold wintry day. 


As the title suggests, this really is not a complicated recipe. You can serve it as a soup. Or a stew. It's the kind of recipe you make in the morning or early afternoon and just keep it warm on the stove ... as you go back for a little more. And then just a bit more. Maybe dunk in a piece of nice buttered bread . . . You know what I mean.

It's even better the next day!

Although the recipe did not call for it, I added garlic, cheese, chicken stock and chicken base. If you cut up your vegetables the day before, this is a snap to prepare with little clean-up. What's not to like?

Most likely, you have all the ingredients in your pantry. This recipe uses skin-on, bone-in chicken thighs. To make it even less expensive, I purchased a package of three leg quarters, cut off the thighs, and froze the drumsticks. You want the skin and bone for their flavor. Eventually, you will discard the bones. Do not use chicken breasts. If you can find them, use a mix of mushrooms for more flavor. 


RICE: You have several options for rice. I opted to used "Ready Rice" from Uncle Ben's. I used two packets of original. If they had it, I would have used one packet of "Wild Rice" and one packet of "Original." You could use raw, white, long-grained rice, in which case I would use anywhere from 1/2 to 3/4 cup--just be sure to wash it in a sieve until the water runs clear.

  • Salted butter
  • Olive oil
  • 1 large yellow onion, finely chopped
  • 2 large carrots, peeled and chopped
  • 2 celery stalks, sliced thin, chopped
  • 1-2 cloves of peeled garlic, sliced thin
  • 1 cup mushrooms, sliced thin
  • 1.5 lb. chicken thighs, skin on, bone in
  • Salt and pepper
  • 2 sprigs sage
  • 2 sprigs thyme
  • 4 cups chicken broth, low sodium
  • 2 cups cooked rice (see notes above)
  • 1 T. chopped fresh marjoram or 1 tsp. dried
  • 1/2 teaspoon dried thyme flakes
  • 1/2 cup Parmesan or similar cheese, grated
  • 1/2 cup heavy cream
  • 1 sprig fresh rosemary (optional)
  • 1 T.  chopped fresh parsley
  • Lemon pepper (optional)

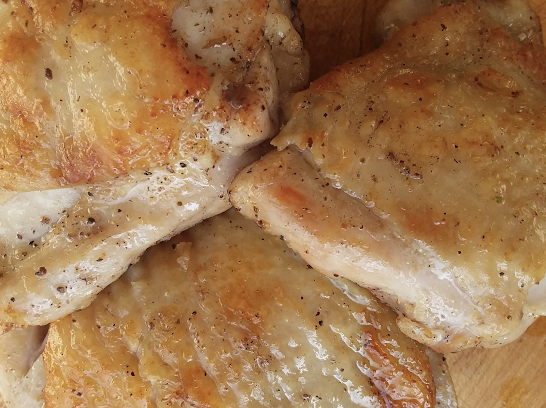
Season chicken with salt and pepper. Heat a Dutch oven or large pan over medium heat. When hot, add about two teaspoons each of butter and olive oil. Add chicken, skin side down until browned, about 2-3 minutes. Flip, cook another two minutes. Remove from pan and place on a plate.

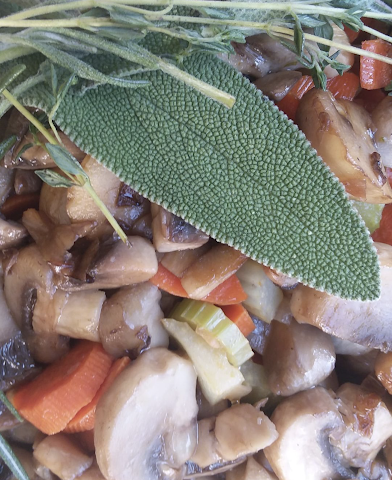
Add another 2 teaspoons of butter and oil to pan. Add your vegetables, stirring frequently until soft and translucent, about five minutes. Add sprigs of sage and thyme. Sprinkle with salt and pepper. Add stock to pan. Bring just to a boil, then reduce to a simmer. Discard sage and thyme

Meanwhile, remove skin from chicken. Save. Using forks or you fingers, shred the meat and discard the bones. Using a sharp knife, finely mince the skin (it is loaded with flavor). Return chicken mixture to simmering pot. 


Add your rice, either cooked or raw. Add marjoram and dried thyme. Add whole sprig of rosemary, if using.

IF USING RAW RICE: Turn to a high simmer. Partially cover pot cook for about 30-35 minutes until rice is tender.

IF USING COOKED RICE: Keep heat at a low simmer. Cook gently for 20-30 minutes.

Remove rosemary sprig. 

Taste for salt. Add grated cheese. Mix until melted. Add cream. I add a sprinkle of lemon pepper, totally optional and a pinch or two of Bell's poultry seasoning.  Mix in parsley. Turn to a bare simmer and allow everything to warm through. Taste periodically adding salt, pepper, or more cheese, if needed.

Ladle into bowls and serve with a side of bread and/or fresh fruit.


Wednesday, January 5, 2022

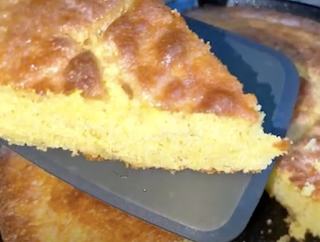
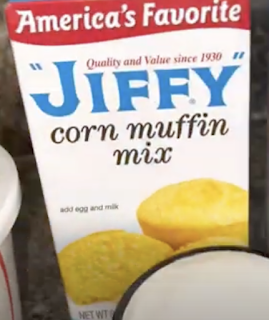
Corrected ...Jiffy Quick Corn Bread

On New Year's Day I made the obligatory Southern black-eyed peas. I wanted cornbread to go with it, but didn't feel much like messing up the kitchen more than it already was.

Instead of beginning a batch from scratch, I simply rummaged the pantry searching for that little box of Jiffy Mix. But I didn't really want a dry cornbread and I didn't want muffins.

Cornbread is so popular in the South that on New Year's,
store shelves are often empty. Still less than one dollar
a box!


I did a bit of quick research and found a number of ways to "spiffy up" Mr. Jiffy.

I added sour cream, brown sugar and grated in frozen butter. I baked it in an 8-inch, non-stick skillet. 

It was delicious.

The crust was nicely browned (the best part) and the interior was moist and pillowy. I did miss the depth of flavor home-made cornbread brings to the table, but this was just fine. More than fine. It was great!

  • 1 box Jiffy cornbread mix
  • 1-2 tablespoons light brown sugar
  • 1/3 cup milk, preferably whole milk
  • 1/3 cup full fat sour cream
  • 1 large egg
  • 1/2 stick butter, COLD, salted or not salted
  • 2-3 tablespoons bacon grease, Crisco or lard
  • 1 7-8 inch pan, cast iron or non-stick

Pre-heat oven to 375 degrees. Place your choice of grease into pan. When melted, it should be a thick "puddle." Meanwhile, prepare your mix.

In a small bowl or cup, mix the milk, sour cream and egg. Add to Jiffy Mix to a medium bowl. Break up any clumps. Using the large holes of box grater, grate the butter into the mix. Toss to coat and to incorporate. 

Add wet ingredients and gently combine until moistened. Do not overmix. 

Using a hot pad, remove pan from oven. Add corn meal mixture. You should hear a sizzle. Smooth the top. Return to oven. Turn down heat to 350. Bake for about 15-20 minutes until top is golden and toothpick comes out clean when inserted in center. Flip onto a wire rack. If desired brush melted butter or drizzle on a bit of honey and brush it over the surface.

Allow to cool 10-15 minutes. Slice into wedges and watch it disappear.


My "from scratch" cornbread recipe is here: http://www.kitchenbounty.com/2014/01/cornbread-south-vs-north.html


Monday, November 22, 2021

All-American Holiday Stuffing/Dressing with Sausage and Cheese (Everything I Learned About Stuffing in the Last 40 Years)

First, let me be clear on this! Nothing could be more sacred than the preparation of stuffing for the holidays. It is the golden sacrament of Thanksgiving and Christmas if any kind of bird is served.  It is our national communion. Do not, under any circumstances, attempt to change or alter your family's usual stuffing unless you have been specifically asked or you have actually tested and tasted the newer one you plan to spring on them. Including this.


Here is my "old" stuffing. Don't get me wrong, it's 
to die for. It looks just like my mom's. But not as good as this recipe.

This recipe is the result of trying a bit of this and a bit of that over the years. It relies heavily on my family favorite, so the base has lots of butter, onion, celery and sausage.

However, I have made several major deviations. The first is the size of the bread. Through the years, bags of stuffing have devolved into almost stale bread crumbs. Crumbs! Chips! That creates a mushy stuffing with little to no texture or structure--and that's what I want. To solve the problem, I use three sizes of bread, so everyone is still able to sneak to the dish of stuffing to steal that nice browned "chunk" we love to pop into our mouth for that pre-meal fix.

Second, let's face it. As a country, we all love Stove Top Stuffing. The flavor is unbeatable. So I add a box. In fact, regardless of your stuffing recipe, you should, too! It's a game changer your entire table will appreciate. Most will never even know.

Stove Top will have the smallest pieces of bread. I don't care. It is flavor-consecrated and that is what we want. Next, like my mom, I do use Pepperidge Farm Seasoned Bread CUBES. Sometimes, they are not easy to find, so shop early. They provide even more flavor. Make sure the package says "CUBES" otherwise you will get the bread "chips." And make sure they are seasoned.

Third, a few weeks before Thanksgiving, I begin to save the end bits of artisan bread I usually have on hand. I tear them into rough, non-geometrical "one-inch-ish" non-geometrical chunks and just throw them into a bag. It is mostly white bread, but sometimes it has rye and whole wheat, too. You can, of course, always buy a loaf of bread, deconstruct it and dry it out in a low oven or just let it sit on the counter a few days.

Last, I always throw in a good handful of shaved Parmesan. You could also use a Granno Padano or Romano cheese. It makes a wonderful addition. Like my mother, I still use Jimmy Dean's sage breakfast sausage   ... but sometimes I sin and use a mild Italian sausage. Sometimes I simply do a mixture of both. It depends what I have on hand. Whatever you choose, do add the cheese!

Personally, I neither like nor appreciate a stuffing that resembles a fruit cake. I do not want apples, or cranberries, dried fruits, figs or nuts. Those items should be reserved for sides. Do not pollute the Holy Stuffing which you want pure and blessed by all who worship and partake.

I live in the South. Here, it is all about cornbread stuffing. I find it mushy. But that is all one hears .... cornbread stuffing this and cornbread stuffing that ....  "Well, Gary," I am often asked, "What kind of stuffing do you make?" Most have no idea about sausage stuffing. So, one day, I brought a pan to the grocery store where I worked and I had the bakery/deli department bake it up fresh.

OMG!

It was more than a hit. My boss turned to me after shoving another forkful into his mouth. "This is the stuffing I have always dreamed about!" He said. "Is there cheese in here?" Then he menacingly wagged his finger in front of me . . . "And don't you ever tell my wife I said how good this is." (Her walnut pie is to die for. I had to beg and beg for the recipe ... walnut+pie).

Enough said .... 

The trickiest part of stuffing, I think, is knowing how much liquid to add. I go by two rules. One: If you put the stuffing in the oven wet, it will come out wet. Put it in dry, it will come out dry. Now here is why you want some large bread pieces. After mixing in the liquids, pick up a random large bread piece. Squeeze it a bit. It should not really be mushy--just spongy with some give-and-take and not dry in the middle. Perfect.

And don't be in a hurry. Let the bread mixture sit so it can absorb gently and slowly.

DO NOT USE CANNED chicken stock or bullion for holiday stuffing. Instead, buy a cheap pack of turkey necks or chicken wings and simmer in a pan with water, celery, onions, carrots and some fresh herbs. In fact, if you fry your turkey (the best ever), you should still do this so your house has the aroma of Turkey Church. If you have an Instant Pot, it is easy and quick to make tons of broth ahead of time and freeze in two or four-cup measures. 

Eggs? I buy medium eggs for this. For a long time, I simply never used them. But, through the years, I found their addition added a bit of "pudding-ness" and lift to the stuffing. I think small or medium eggs seem to have a more equal ratio of yolk to white and are easier to work with. 

Use quality butter, such as Plugra. I use salted. It's your call. And don't be afraid to add more butter if needed. Look at it this way ... this is a lot of bread .... If it were slices, how much butter would actually need to spread on each piece?

I begin with dried bread. That is the base from which you need to work. You will want a  total of 2 pounds dried bread (32 ounces), so go from there. Just so you know, my original recipe was 40 ounces or 2.5 pounds of bread. This recipe goes by weight, not volume, since it almost impossible to determine an exact, uniform volume for dried bread since people will cut it differently. One person's "cup" will not be similar to another's measurements. 

For this recipe, remember most of the breads are already seasoned, so don't go overboard on adding additional ones. Begin with less. Mix. Taste. Re-season. Do this before you add the raw eggs. Fresh, raw eggs don't bother me. If they do you, first add the stock. Taste, re-season, then mix in the eggs instead of mixing with the stock.

If you grow your own herbs, it's tempting to get into the spirit and want toadd your own. Be careful. With plain bread, it works. Not so much with pre-seasoned. Save the fresh for garnish and show.


Sometimes grocery stores offer their own
stuffing croutons from day-old bread.
That's rarely happening anymore ....

  • 1 box Stove Top Stuffing (6 ounces) I use chicken-flavored.
  • 1 bag Pepperidge Farm CUBED Herb Stuffing (12 ounces)
  • 12-14 ounces bread torn into large random pieces and dried
  • 1/2 cup fresh shaved Parmesan or similar (a good handful)
  • 2 garlic cloves, pressed 
  • 1 to 1.5 sticks butter (not margarine)
  • 1 lb. sage breakfast sausage (Jimmy Dean) or mild Italian, casings removed (or a combination of both)
  • 12 ounces chopped onion (about one large), yellow or white, finely diced
  • 12 ounces chopped celery (about 4-5 ribs) finely diced
  • 2 heaping tablespoons fresh-minced parsley
  • Fine-minced fresh sage leaves OR one-half teaspoon, dried (optional) Be careful here. Sage can be overpowering.
  • 1 1/2 teaspoon minced fresh thyme leaves or  about 1/2 teaspoon dried leaves, slightly crushed (optional)
  • Powdered seasoning of your choice such as Bell's (highly recommended) poultry seasoning of your choice, or summer savory (optional)
  • 4 cups poultry stock, cooled or room temperature if homemade
  • 2-3 medium/small eggs
  • Salt and pepper to taste

Preheat oven to 350 fahrenheit degrees.

Lightly grease your casserole dish or dishes. Sometimes I use bacon grease. You want the stuffing to be about 1.5-2 inches high in whatever sized dishes you use. This recipe will easily give you a 13x9 pan of stuffing plus some extra. 

In the largest mixing bowl you own, dump all of your dried breads, parsley, and cheese. Lightly mix with your fingers to combine.

Melt butter in a large frying pan. Add your diced celery and onions. About halfway, add garlic and, if using, fresh sage.  Cook on medium just until vegetables are soft and translucent. Transfer to bowl of dried breads.

In the same pan, add your sausage meat, breaking up clumps as you cook. After it loses its pink, add to bowl, grease and all. In the same pan, add about 2 cups of your stock to warm it up and to deglaze the pan.

Put remaining 2 cups of cold stock into a jug or small bowl. Add eggs and beat until well combined. Add to stuffing bowl and toss with your hands, fingers until everything is "painted."

Now, continue to add warm stock a little  at  a time to prevent 'scrambled eggs' until desired consistency is reached. If you run out of stock, it is okay to use water. Sometimes my mother used warm milk. If you have leftover stock, use for gravy. Be sure all the bread has absorbed the liquid and none have dry centers.

Taste for seasonings, including salt and pepper. Pepper is often underused in stuffing. If desired, sprinkle with some poultry seasoning.

Carefully arrange stuffing mix in your casserole dish(es). Before baking, I always sprinkle with just a bit of dried, crushed thyme flakes. Cover with foil. Bake until the center registers about 150-160, about 45-50 minutes. Remove foil and bake an additional 15-30 minutes longer or until the top is golden and crisp. Keep an eye on it.

To Do Ahead: Bake until stuffing reaches 160. Remove from oven. Uncover to cool. Then re-cover and place in refrigerator. When ready to bake, uncover and bake until top is browned and warmed through. 

If you half this recipe, still use the full box of Stove Top and then 8 ounces each of the Pepperidge Farm and homemade bread chunks.